Forms
Contents
QC Forms and their Hierarchy
- Main/Header Form (also known as the root screen or parent screen).
- Detail Form (also known as the child screen).
- Additional Detail Forms (each QC Form can have another detail/child screen below it).
A QC Form set consists of a Header form, with one or more Detail forms attached to it. When you open a form from the QC Results menu, the first screen you see is the Header form. Usually Header forms simply serve as an entry point into the lower (detail/child) screens that actually collect data. Often, a Header form does not have a backing database table attached to it. This screen typically provides keys for the child screens attached to it. Whether or not a screen contains a backing table is determined by whether or not the screen has any keys. If the screen has no keys, no backing table is created.
In the screen displayed below, there are three fields, a label with the basic screen title, a Date Editor (labeled Date Filter) for filtering and creating new entries, and a Drill-Down Grid (labeled Shift Entry) for adding and viewing child rows. For an explanation of available controls and how they work, see the Controls and Control Types sections.
Header Form
This screenshot is from the Header form ‘Daily Pre-Op Inspection’.
Web-Based Client Example
WPF Client Example
View Key
Selecting a row in the grid Clicking the View Key button will bring up the detailed form in the state that it was previously saved.
Add Key
Clicking the Add Key button will take you to the detailed form to add data.
Detail Form
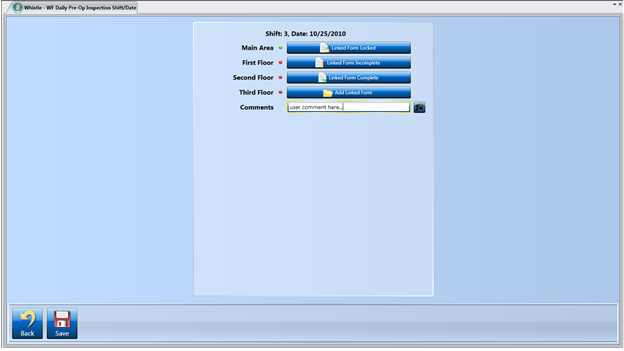
This is a Detail form that has been broken up into four different sections with the Form Link Control. Notice that this screen has a ‘Save’ button that becomes enabled when there is unsaved data that can be persisted to the backing table (in this case the text that has been entered into the ‘Comments’ field). By clicking on any of the Form Link Controls, the user is navigated to the appropriate child screen.
Menu Bar
The Menu Bar is typically present on each Detail form. At times, certain buttons will be "clickable" while others are not, depending on the state of the form and form data.
Back Button
This button is used to return to the Form or Menu prior to the form you are on now. And progress on the screen not committed may not be saved.
Save Button
This button saves the current progress to the database so that it can be resumed again at a later time.
Done Button
This button becomes active when the minimum amount of mandatory data is supplied to the form. Clicking on this button commits the entered data and transaction to the database then locks the form for read-only access.
Delete Button
This button is only active for certain admin users with appropriate security privileges.
Return to QC Results


