Difference between revisions of "36:Multi Move"
| (14 intermediate revisions by 3 users not shown) | |||
| Line 1: | Line 1: | ||
| − | + | The Multi-Move window is used to simultaneously move multiple pallets at a single time. It works by individually selecting the pallets the user wishes to move and placing them on a list. Once the user is satisfied with the list, the destination bin is input and the move transactions are performed. | |
| − | + | ==How to add a pallet to the list== | |
| + | The '''Track #''' field at the top of the window is available for scanning or typed entry of the desired pallet to be added to the list. | ||
| − | + | [[Image:MultiMove1.gif|500px|Image:MultiMove1.gif|500px]] | |
| − | + | ||
| + | The list of pallets to be moved is maintained in an embedded resultset which resides in the middle of the screen. This box shows approximately 5-6 pallets at a time, using a scroll-bar to maneuver between them. This box maintains the column number, or position of the pallet in the list. It also maintains the pallet number, its corresponding bin and the status of the pallet. | ||
| + | ==How to remove a pallet from the list== | ||
| + | Should the user choose to remove a pallet on the list, the user simply highlights the desired pallet using the arrow keys. The user then tabs out of the box to the "<Remove>" button and presses "Enter" to activate the removal function. This will remove the highlighted pallet from the list. The focus will return to the '''Track #''' field, so you can enter another track number. | ||
| + | [[Image:MultiMove2.gif|500px|Image:MultiMove2.gif|500px]] | ||
| − | |||
| − | |||
| + | ==How to specify the destination bin== | ||
| + | The user can scan or enter the destination bin name into the '''To Bin''' field at any time. This will be the location to where each pallet on the list will be placed when the transaction is completed. | ||
| − | + | [[Image:MultiMove3.gif|500px|Image:MultiMove3.gif|500px]] | |
| − | + | ||
| + | ==Repeat Move option== | ||
| + | There is a '''Repeat Move''' checkbox available for the user to specify. Should the user choose this option, subsequent multi-moves will be to the same destination bin each time until this is cleared. This checkbox is only available if it is set from the window settings for this screen. To use, tab or use the arrow keys to go to the checkbox. Pressing the "<Spacebar>" will toggle the checkbox on and off. | ||
| − | + | [[Image:MultiMove4.gif|500px|Image:MultiMove4.gif|500px]] | |
| − | + | ||
| + | ==Committing the Multi-Move transaction== | ||
| + | When the user is content with the list of pallets to be moved simultaneously to the destination bin, the user may tab down to the "<Move>" button and commit the multi-move. A prompt-before-move box may appear depending on the screen settings made by the user. | ||
| + | [[Image:MultiMove5.gif|500px|Image:MultiMove5.gif|500px]] | ||
| − | + | Press <Enter> to clear this message, and commit the transaction. | |
| − | + | ||
| + | ==Success Message== | ||
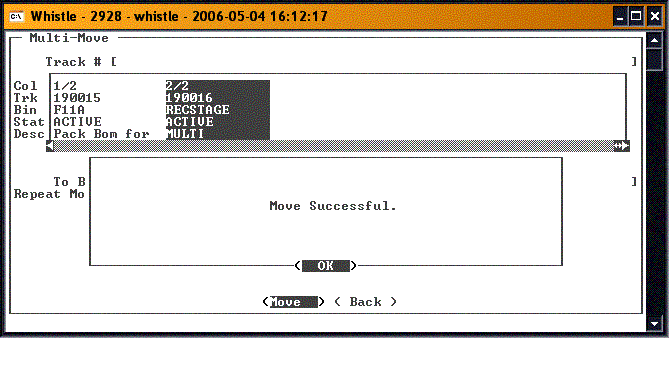
| + | A success box for the transaction may also appear, depending on the screen settings for Multi-Move. | ||
| + | [[Image:MultiMove6.gif|500px|Image:MultiMove6.gif|500px]] | ||
| − | |||
| − | |||
| − | + | ==[[36:Multi Move Window Settings|Multi Move Window Settings]]== | |
| − | + | ||
| − | == | + | |
| − | + | ||
| − | + | ||
| − | + | ||
| − | + | ||
Latest revision as of 19:19, 8 June 2006
The Multi-Move window is used to simultaneously move multiple pallets at a single time. It works by individually selecting the pallets the user wishes to move and placing them on a list. Once the user is satisfied with the list, the destination bin is input and the move transactions are performed.
Contents
How to add a pallet to the list
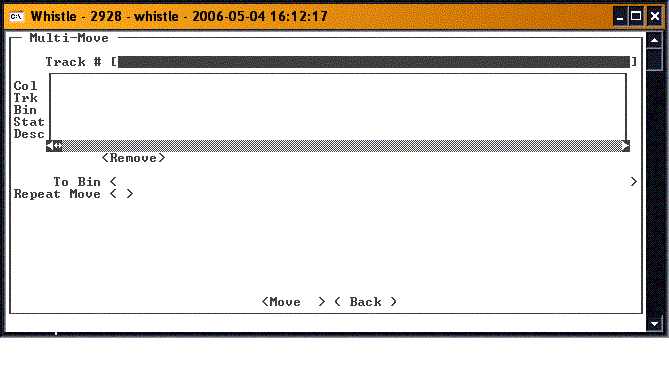
The Track # field at the top of the window is available for scanning or typed entry of the desired pallet to be added to the list.
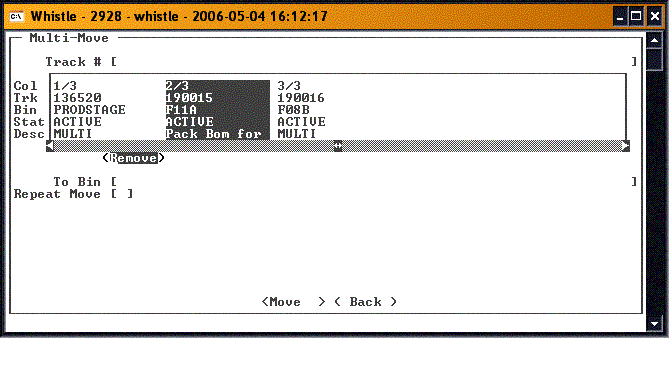
The list of pallets to be moved is maintained in an embedded resultset which resides in the middle of the screen. This box shows approximately 5-6 pallets at a time, using a scroll-bar to maneuver between them. This box maintains the column number, or position of the pallet in the list. It also maintains the pallet number, its corresponding bin and the status of the pallet.
How to remove a pallet from the list
Should the user choose to remove a pallet on the list, the user simply highlights the desired pallet using the arrow keys. The user then tabs out of the box to the "<Remove>" button and presses "Enter" to activate the removal function. This will remove the highlighted pallet from the list. The focus will return to the Track # field, so you can enter another track number.
How to specify the destination bin
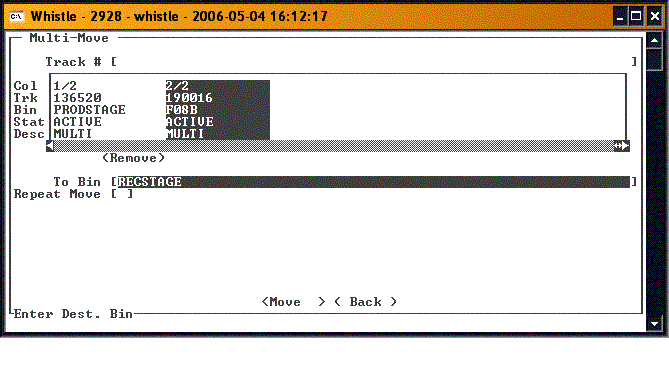
The user can scan or enter the destination bin name into the To Bin field at any time. This will be the location to where each pallet on the list will be placed when the transaction is completed.
Repeat Move option
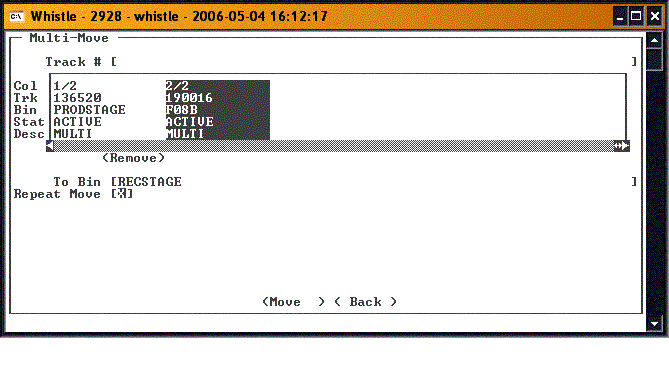
There is a Repeat Move checkbox available for the user to specify. Should the user choose this option, subsequent multi-moves will be to the same destination bin each time until this is cleared. This checkbox is only available if it is set from the window settings for this screen. To use, tab or use the arrow keys to go to the checkbox. Pressing the "<Spacebar>" will toggle the checkbox on and off.
Committing the Multi-Move transaction
When the user is content with the list of pallets to be moved simultaneously to the destination bin, the user may tab down to the "<Move>" button and commit the multi-move. A prompt-before-move box may appear depending on the screen settings made by the user.
Press <Enter> to clear this message, and commit the transaction.
Success Message
A success box for the transaction may also appear, depending on the screen settings for Multi-Move.
