GX:Case Move
The case move screen is used for transferring a catchweighted case from one container to another.
To Move a Case
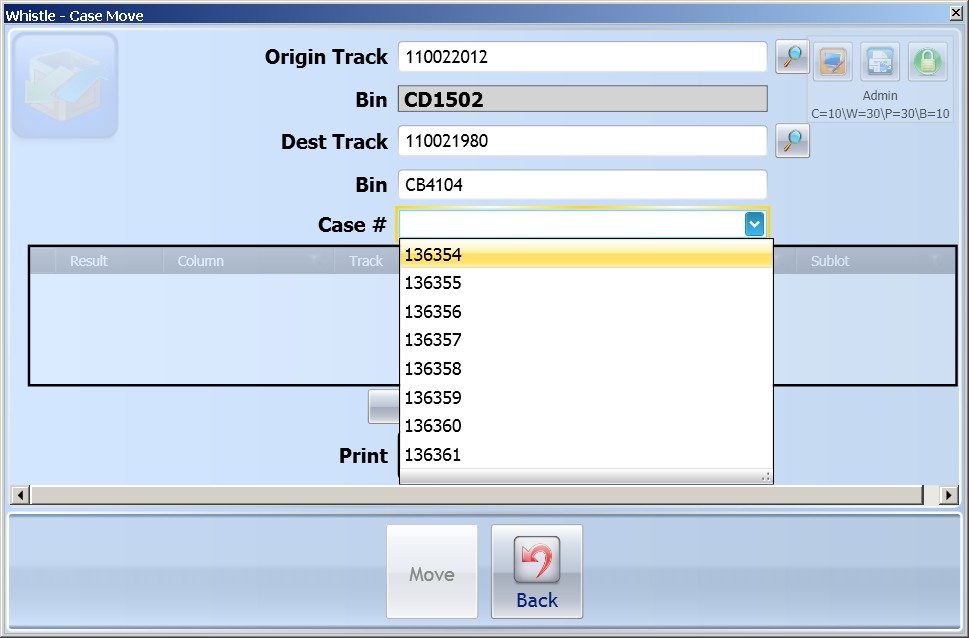
Enter the Tracking Number of the Container from which you would like to move a case in the OriginTrack field. If you don't know the number, use the list (Ctrl-A) method to bring up a list of pallets to choose from. For details, see the Find Inventory section of this user guide. Filling in a pallet number will automatically load the value into the Bin field.
Enter the Tracking Number of the Container that you would like to move a case to in the Dest Track field. If you don't know the number, use the list (Ctrl-A) method to bring up a list of pallets to choose from. For details, see the Find Inventory section of this user guide. Filling in a pallet number will automatically load the value into the Bin field.
Enter the Case Number that you would like to move. If you do not know the case number, pressing Ctrl-A while in the case number field will bring up a list of cases on the source pallet. Select the case to be moved using the arrow keys, and press "Enter".
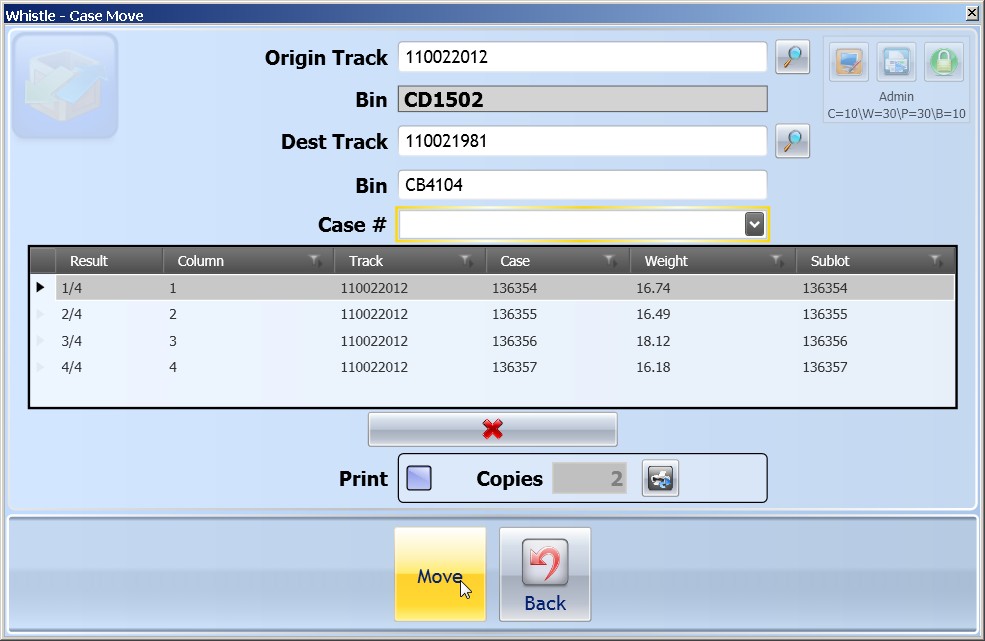
Scroll the cursor out of the Case # field. The case information will be loaded into the horizontal case move screen.
You may continue adding case #s to your list by entering new case numbers in the Case # field, or selecting them from the list.
Removing a case
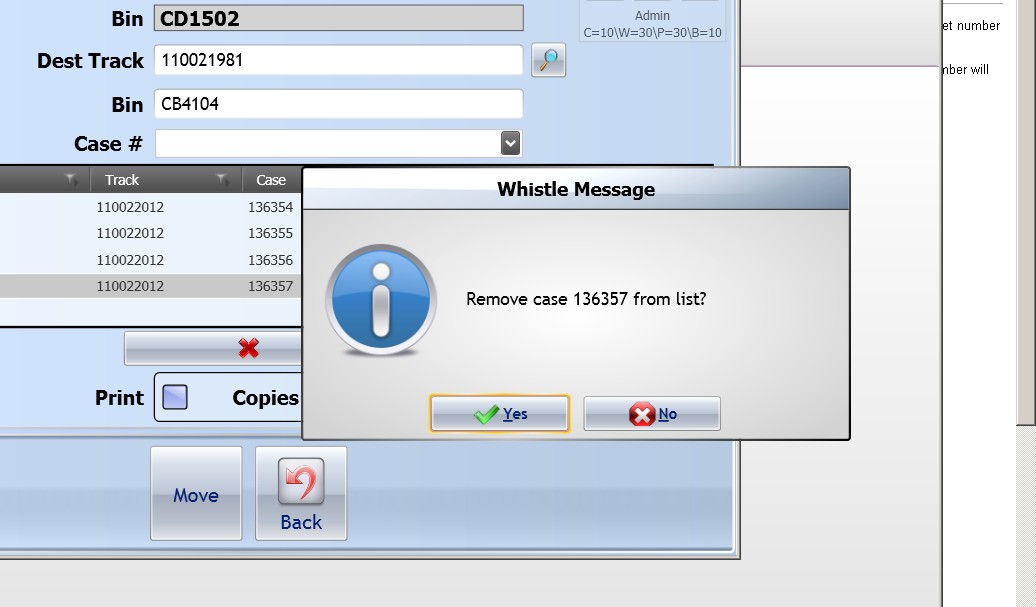
If you have selected a case in error, and wish to remove it from the list of cases to be moved, select it using the arrow keys. When the case is highlighted, select "<REMOVE>".
A “Print” checkbox and “Copies” field are available so the user may specify whether new print tags are required and how many copies are preferred.
Select "<OK>" to commit the your transaction and transfer the cases from one container to another.


