GX:Studio:User Configuration Tool
Introduction
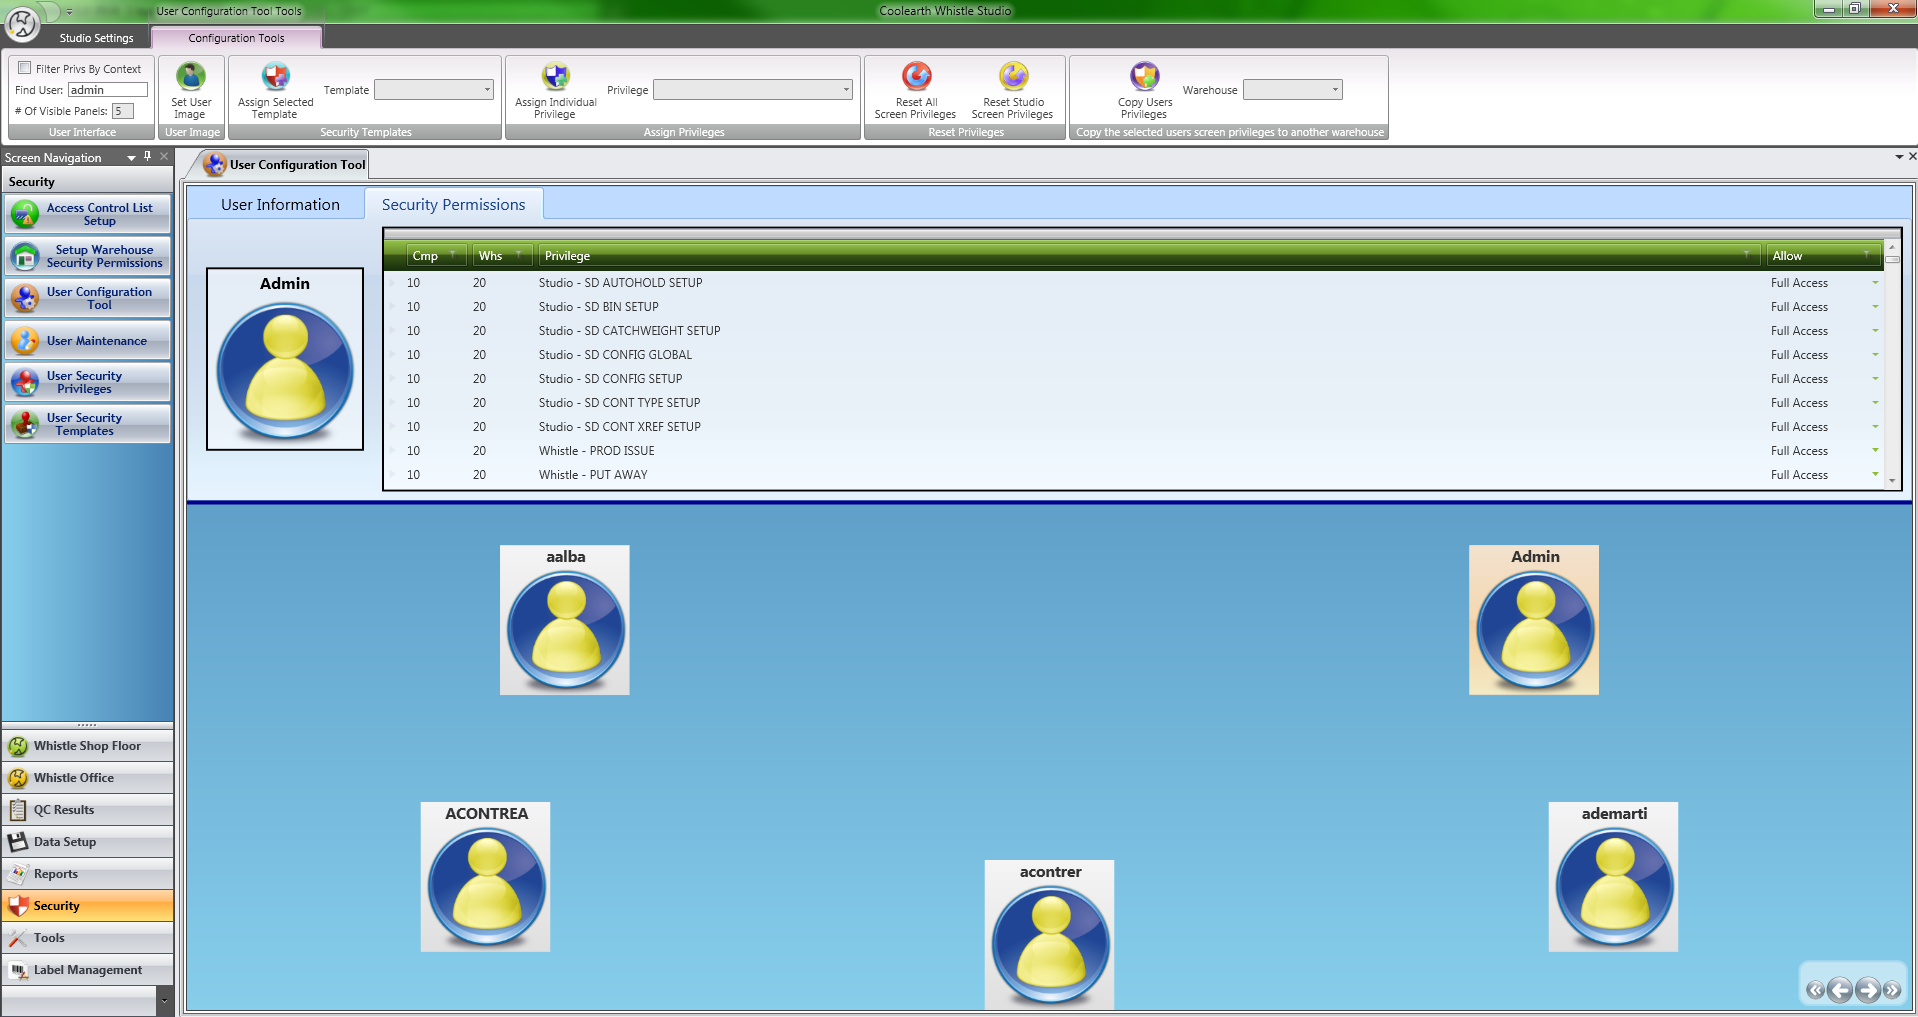
The User Configuration Tool is used for assigning permissions to individual users inside your ERP system. Permissions can be assigned to a user one at a time, or in batches through the use of a security template. There are basically three parts that make up the user interface for this screen: the User Carousel View, the Selected User Tab Control, and the Ribbon Toolbar.
User Carousel View
This control can be used to browse through the list of available users and select one to assign permissions to. If a user has an assigned user image, the image will show up on that users card. To navigate through the list use the arrow control in the bottom right corner of the User Carousel View control. The double arrow will navigate through several users in the list while the single arrow will navigate just one user at a time. If you know the user you are looking for, you can simply type the user key into 'Find User' edit control on the Ribbon Toolbar.
Selected User Tab Control
The Selected User Tab Control displays information about the currently selected user. Currently it has two tab pages - 'User Information' and 'Security Permissions'.
User Information
This is basic information that has been entered into the ERP system for the currently selected user such as e-mail address, default company/warehouse, full name etc. This information is for display purposes only and for all intensive purposes read-only.
Security Permissions
This tab displays the list of already assigned permissions for the currently selected user. If the 'Filter Privs by Context' check-box is checked, only the permissions for your current Studio context (company/warehouse) will be displayed in the grid. Otherwise all assigned permissions in all warehouses are displayed. You can also sort the privileges however you like by clicking on the column header for the column you wish to sort on. If you wish to sort on more than one column at a time, hold down the control key while clicking on the column headers. The permissions grid can also be filtered on by clicking the small filter icon in the column header.
Removing User Permissions
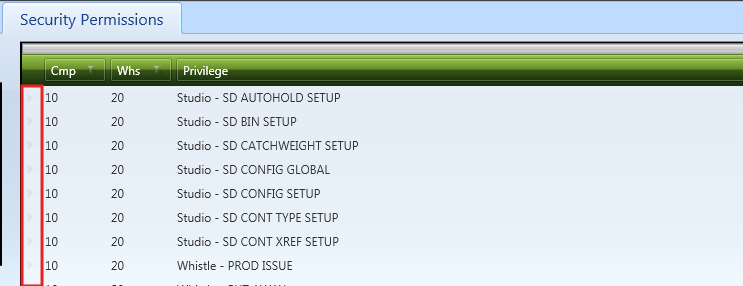
This grid can also be used to remove permissions from a user. To remove a permission, do a row select by clicking on the small triangle in the row header area for the row you wish to delete. I have outlined the row header area in red in the screenshot below.
Once the permission has been selected, simply hit the delete key to delete the permission from the user. A confirmation dialog will appear to confirm.
Ribbon Toolbar
The ribbon toolbar is the UI portion that runs along the top of the screen inside Whistle Studio. Several features are activated using controls contained within the Ribbon Toolbar. The following sections describe each of the ribbon groups found inside the Ribbon Toolbar for this screen.
User Interface Ribbon Group
This group controls user interface settings as well as an edit control for finding users.
- Filter Privs By Context - Check this box if you only want to see the permissions in the Security Permissions grid for current company/warehouse that you are currently in. You can change company/warehouse inside of Studio by clicking on the 'Studio Settings' ribbon tab. If it is un-checked (default), you will be able to see all permissions for the currently selected user regardless of company/warehouse.
- Find User - Enter in a user key in to this edit control to automatically find and select a user that matches.
- # Of Visible Panels - This setting controls how many panels are simultaneously displayed in the User Carousel View.
User Image Ribbon Group
Custom images can be uploaded and assigned to a user by clicking 'Set User Image' button. A Windows select file dialog will appear and used to select an image file that you would like to upload as the currently selected user's image. The image for a user is displayed when logging into Studio. It also is also used in a few other of the screens inside Studio that are oriented around users. The use of this feature is entirely optional.
Security Templates Ribbon Group
By selecting a security template from the 'Template' drop-down and then clicking the 'Assign Selected Template' you can apply a security template to the currently selected user. Only templates that exist in the current company/warehouse will show up in the drop-down list.
Assign Privileges Ribbon Group
You also have the option of assigning an individual privilege to a user. Simply select the privilege you wish to assign from the 'Privilege' drop-down and click the 'Assign Individual Privilege' button to apply the permission to the currently selected user.


