Difference between revisions of "GX:Category:Label Management"
| Line 84: | Line 84: | ||
====Label Printer==== | ====Label Printer==== | ||
| − | It is possible to set up different printers to be used for different labels, or instruct the system to use the default printer by putting in the word DEFAULT as the printer name. If nothing is set up for that label, | + | It is possible to set up different printers to be used for different labels, or instruct the system to use the default printer by putting in the word DEFAULT as the printer name. If nothing is set up for that label, it will check the default printer to see if it is valid for this label. If it is not, the user will be asked if they wish to select another printer to use. If they say Yes, they will be taken to the Printer setup screen to select the printer to be used (Note: this must be a printer set up for this label). If they say No, printing will stop. |
Revision as of 07:57, 21 June 2013
Contents
Label Management
The label management system is used to specify which labels that are printed depending on various criteria. You can set up a labels based on inventory, orders, transaction types, or customers. This section of Whistle Studio allows you to set up the labels.
Security
The needed permissions for these screens are:
- SD STUDIO ACCESS - access to Studio
- SD LABEL MANAGEMENT - access to Label Management
Usage
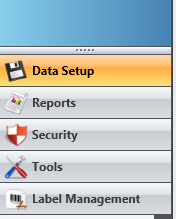
When you log into Studio, you will see the <Label Management> button on the Main Menu.
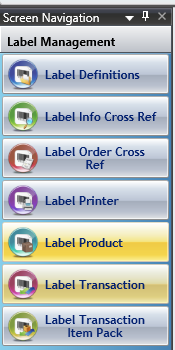
Pressing this button takes you to the Label Management menu.
Label Definitions
Select Label Definitions to set up the labels to be used.
Here, you can enter in the data for a label definition. As shown, you can set up the same label definition for multiple labels. This is showing a label set up for a specific item, with one label version for a pallet and one for SSCC.
Label - Enter a number in the Label field. This number is what is used to select this label on the other screens.
Label File Name - Enter in the text file containing the label printing information. As you can see on the screen, the same label can be set up for multiple text files. In this example, the label is for a specific inventory item, and there is one label printed for a pallet, and a different label printed for an SSCC barcode when that inventory item is produced.
Label Desc - enter in a description of this label.
Label Name - give a name to this label.
Label Layout - not used at this time
fileDBFlag - not used at this time
Label Type - specify the type of label. This dropdown shows the various types of labels available to be printed, such as PALLET or CASE.
Label Info Cross Reference
This screen allows you to set up label for a specific order, customer, item/pack, transaction, and order type. It is only valid for a specified time period. It is the most specific label set up of the label management system.
Label - Select the label for this order, that was set up using the Label Definition screen.
OrderKey - Enter the order number for this label.
Start Date - Enter the date where the label becomes available.
End Date - Enter the date that the label expires.
Customer - Select the customer.
Item - Select the item/pack whose information is used on this label.
OrderType - Select the order type, such as Sales Order or Purchase Order.
Transaction - Select the transaction.
Label Order Cross Reference
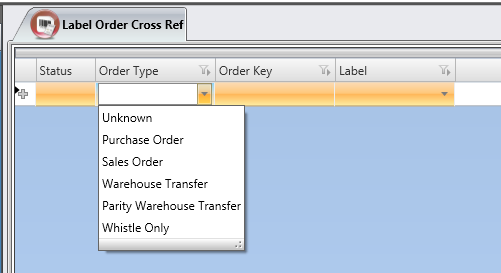
This screen allows you to set up a label for a specific order.
OrderType - Select the order type, such as Sales Order or Purchase Order.
OrderKey - Enter the order number for this label.
Label - Select the label for this order, that was set up using the Label Definition screen.
Label Printer
It is possible to set up different printers to be used for different labels, or instruct the system to use the default printer by putting in the word DEFAULT as the printer name. If nothing is set up for that label, it will check the default printer to see if it is valid for this label. If it is not, the user will be asked if they wish to select another printer to use. If they say Yes, they will be taken to the Printer setup screen to select the printer to be used (Note: this must be a printer set up for this label). If they say No, printing will stop.
Label - Select the label id for which you are setting up the printer.
Printer Id - Select the printers that can be used to print this label, or DEFAULT if you want to print to the default printer.
Label Product
On this screen, you are setting up labels for specific products. These labels are also set up with the time periods in which they are valid.
Item - Select the appropriate inventory for which you are setting up the label.
Label - Select the label to use for this inventory.
Start Date - Select the date this label becomes valid.
End Date - Select the expiration date for this label setup.
Label Transaction
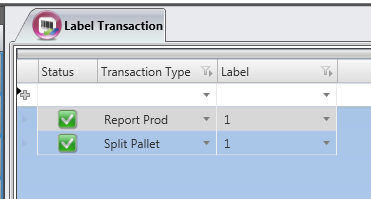
You can also set up labels for specific transaction types.
Transaction Type - Select the type of transaction.
Label - Select the label to print for this transaction.
Label Transaction Item Pack
Labels may also be specified for different item/packs for the same transactions.
Item - Select the item/pack.
Transaction Type - Select the desired transaction type.
Label - Select the label to be used for this item/pack - transaction combination.


