Difference between revisions of "GS:WT Push Window"
| Line 2: | Line 2: | ||
Select '''WT Push''' from the Shipping menu. You will see the following screen. | Select '''WT Push''' from the Shipping menu. You will see the following screen. | ||
| + | |||
| + | [[Image:WTPush1.gif|500px|Image:WTPush1.gif|500px]] | ||
Enter the warehouse transfer # in the Order # field, or press Ctrl-A to see a list of available warehouse transfers to ship. | Enter the warehouse transfer # in the Order # field, or press Ctrl-A to see a list of available warehouse transfers to ship. | ||
| + | |||
| + | [[Image:WTPush2.gif|500px|Image:WTPush2.gif|500px]] | ||
Select a warehouse transfer from the list, by using the arrow keys to highlight it. Press <Enter> to select the WT. | Select a warehouse transfer from the list, by using the arrow keys to highlight it. Press <Enter> to select the WT. | ||
Selecting the order will fill in the FWhs field with the current warehouse information, and the TWhs with the warehouse you are shipping to. | Selecting the order will fill in the FWhs field with the current warehouse information, and the TWhs with the warehouse you are shipping to. | ||
| + | |||
| + | [[Image:WTPush3.gif|500px|Image:WTPush3.gif|500px]] | ||
Enter the BOL number in the BOL field. | Enter the BOL number in the BOL field. | ||
Revision as of 11:49, 26 May 2006
This function is for moving inventory to another warehouse. The Warehouse Transfer (WT) is set up in Adage.
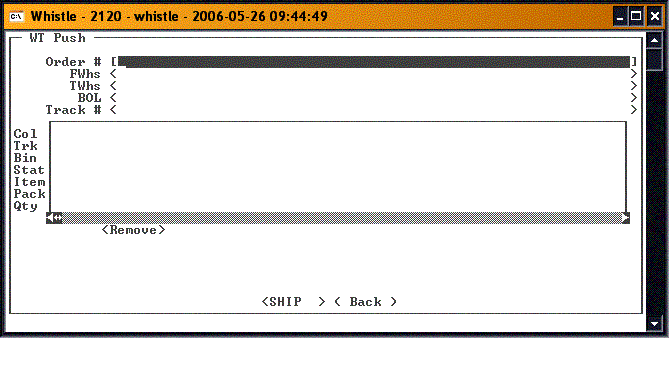
Select WT Push from the Shipping menu. You will see the following screen.
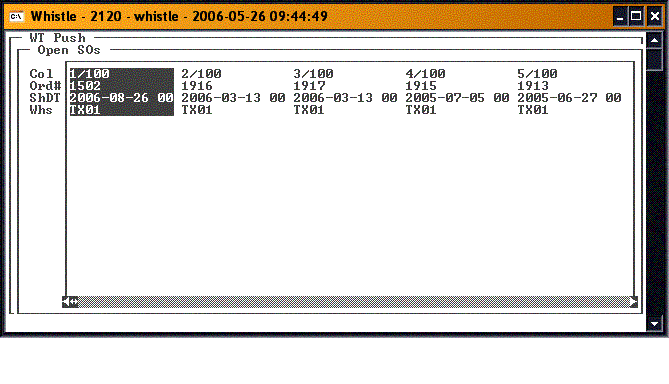
Enter the warehouse transfer # in the Order # field, or press Ctrl-A to see a list of available warehouse transfers to ship.
Select a warehouse transfer from the list, by using the arrow keys to highlight it. Press <Enter> to select the WT.
Selecting the order will fill in the FWhs field with the current warehouse information, and the TWhs with the warehouse you are shipping to.
Enter the BOL number in the BOL field.
Scroll to the Track # field. Enter the pallet number containing the inventory to be shipped. If you don't know the pallet number, press Ctrl-A while in the track # field to bring up a list of pallets to select from. All selected pallets will be displayed in the embedded result set.
If a pallet has been selected in error, it may be removed by highlighted the pallet in the result set, using the arrow keys, and then scroll to and pressing the <Remove> button. The list of pallets will be refreshed, and the removed pallet will not appear on the new list.
Continue to select pallets until the WT has been filled. When finished selecting pallets, press the <SHIP> button.
You will be returned to the Order # field, to select another WT for shipping.
When finished shipping WTs, select the <Back> button, or press "Esc" to return to the Shipping menu.


