Difference between revisions of "GX:Update Pallet"
| (10 intermediate revisions by 2 users not shown) | |||
| Line 1: | Line 1: | ||
| − | This Whistle screen is used to | + | This Whistle screen is used to update the information about a pallet. Various fields are available for update, including, among others, Pull Date, Prod Date, and Lot. |
| − | ==How to | + | ==How to Update a Pallet== |
| − | The user should arrow or tab down onto the | + | The user should arrow or tab down onto the '''Track''' field. This field will take a container pallet number. Enter a pallet number, or use the "Ctrl" and "A" keys to go to the [[GX:Find Inventory|Find Inventory]] screen to get a list of pallets to choose from, or scan the pallet label. |
| + | [[Image:GX_UpdatePallet_100.jpg|500px|Image:GX_UpdatePallet_100.jpg|500px]] | ||
| − | + | Once a pallet number has been entered, the specific inventory to be updated on the pallet may be selected using the "A" and "Z" keys to scroll through the inventory. | |
| + | [[Image:GX_UpdatePallet_NewInfo_101.jpg|500px|Image:GX_UpdatePallet_NewInfo_101.jpg|500px]] | ||
| − | + | Select the "More" button to add additional information about the pallet. | |
| + | [[Image:GX_UpdatePallet_MoreInfo_102.jpg|Image:GX_UpdatePallet_MoreInfo_102.jpg]] | ||
| − | + | After finding the inventory, the user should tab or down arrow into the '''New Information''' section. Various fields will be available for updating. The user can enter in any new values desired in the appropriate fields. | |
| + | Once the changes have been entered, the user can then tab or use the arrow keys to move down to the "<OK>" button. Pressing "ENTER" will begin the transaction, and when it finishes, you will be prompted with a confirmation message box (depending on your screen settings). The message box will specify which fields were changed. In the example below, the pull date field was changed. | ||
| + | [[Image:GX_UpdatePallet_ConfirmDialogue_103.jpg|500px|Image:GX_UpdatePallet_ConfirmDialogue_103.jpg|500px]] | ||
| − | + | ==[[GX:Update Pallet Window Settings|Update Pallet Window Settings]]== | |
| − | + | ||
| − | == | + | |
| − | + | ||
| − | + | ||
Latest revision as of 09:23, 1 August 2012
This Whistle screen is used to update the information about a pallet. Various fields are available for update, including, among others, Pull Date, Prod Date, and Lot.
How to Update a Pallet
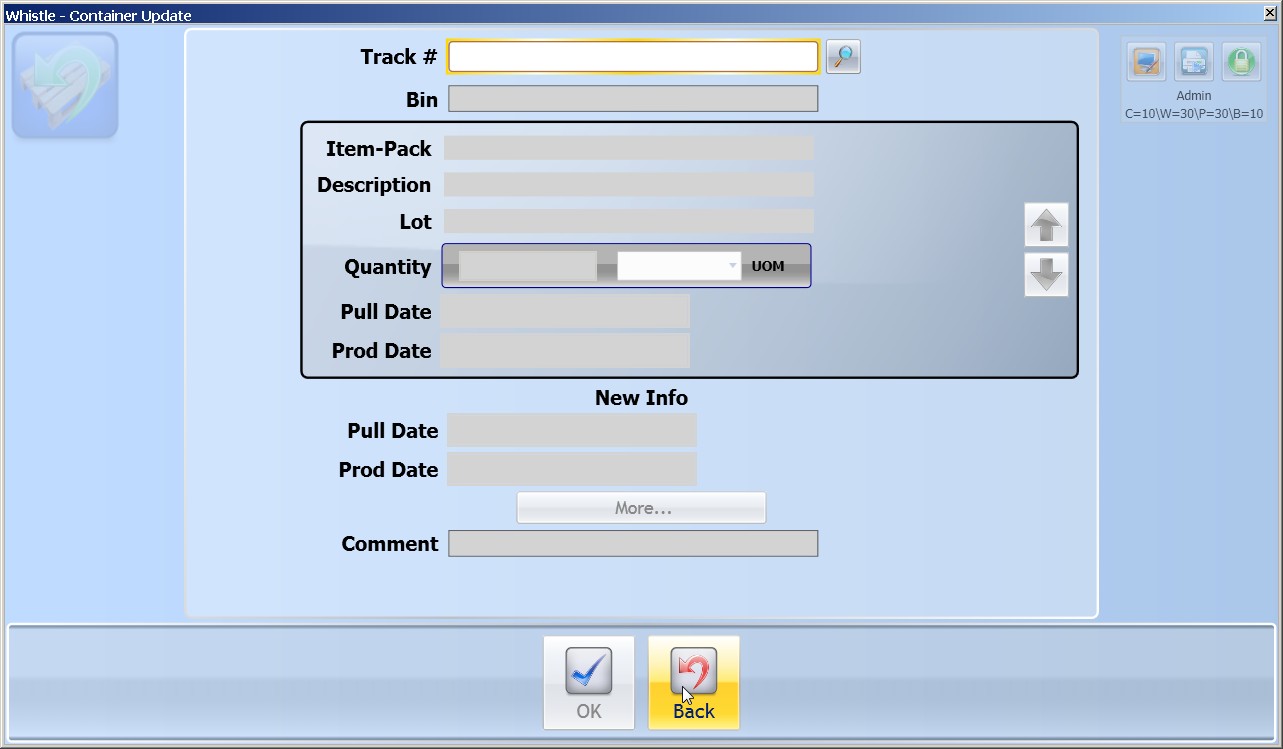
The user should arrow or tab down onto the Track field. This field will take a container pallet number. Enter a pallet number, or use the "Ctrl" and "A" keys to go to the Find Inventory screen to get a list of pallets to choose from, or scan the pallet label.
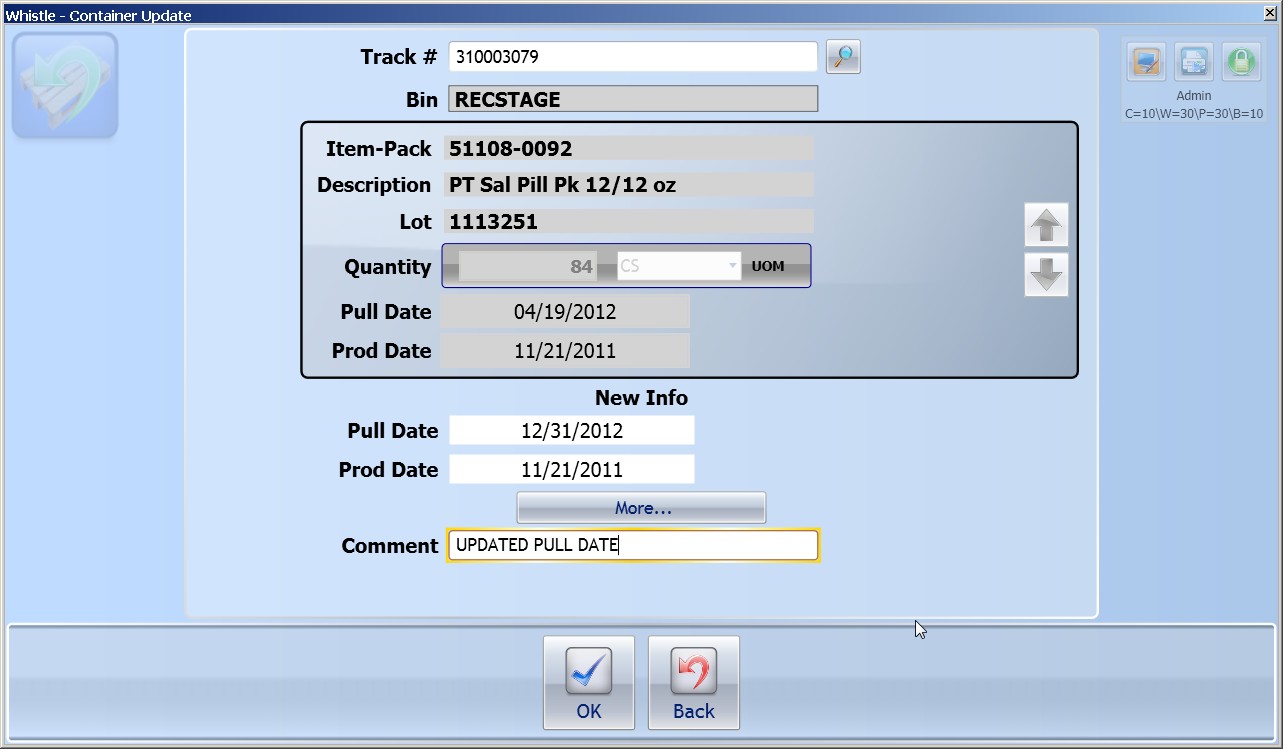
Once a pallet number has been entered, the specific inventory to be updated on the pallet may be selected using the "A" and "Z" keys to scroll through the inventory.
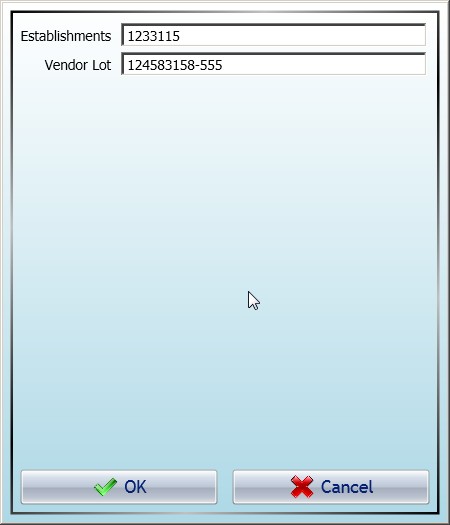
Select the "More" button to add additional information about the pallet.
After finding the inventory, the user should tab or down arrow into the New Information section. Various fields will be available for updating. The user can enter in any new values desired in the appropriate fields.
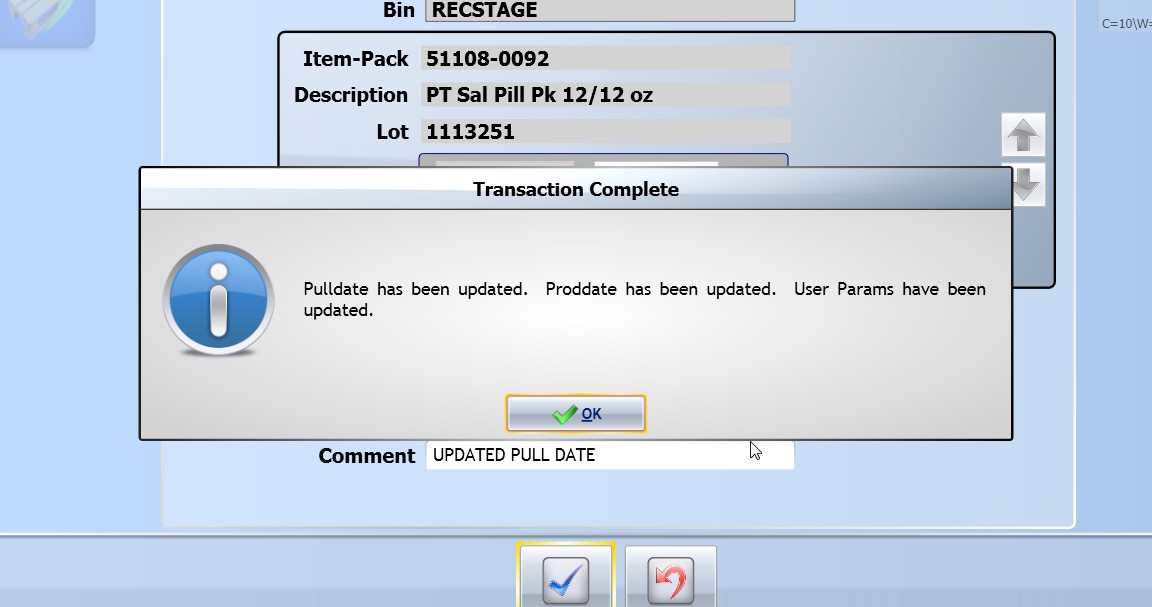
Once the changes have been entered, the user can then tab or use the arrow keys to move down to the "<OK>" button. Pressing "ENTER" will begin the transaction, and when it finishes, you will be prompted with a confirmation message box (depending on your screen settings). The message box will specify which fields were changed. In the example below, the pull date field was changed.


