Difference between revisions of "GX:Item Issue Window"
| (13 intermediate revisions by 3 users not shown) | |||
| Line 1: | Line 1: | ||
This screen is for issuing items to production. Select "Item Issue" from the Production Menu. | This screen is for issuing items to production. Select "Item Issue" from the Production Menu. | ||
| + | |||
| + | [[Image:GX_ItemIssue_Main_100.jpg|500px|Image:GX_ItemIssue_Main_100.jpg|500px]] | ||
==Issuing Items== | ==Issuing Items== | ||
| − | Enter the | + | Enter the '''Track #''', either by typing it in, scanning a pallet label, or selecting a pallet from a list by pressing the "Ctrl" and "A" keys while the Track # field is highlighted ([[GX:Find Inventory|Find Inventory]]). Several fields will be filled in with the track data. Focus will be on the '''Bin #''' field. |
| + | |||
| + | [[Image:GX_ItemIssue_TrackFilter_101.jpg|500px|Image:GX_ItemIssue_TrackFilter_101.jpg|500px]] | ||
| + | |||
| + | If there is more than one item on the track, up and down arrows will appear on the right side of the screen. Use the "A" and "Z" keys to scroll between the items. Select the '''item''' that you would like to issue, and leave the field by pressing "Enter", an arrow key, or the tab key. You will then be on the '''Dtl Code''' (Reason) field. | ||
| + | |||
| + | Fill in the rest of the fields. If you are issuing an entire pallet, you can either enter the pallet quantity in the Issue Qty field, or leave it blank. This will cause the entire pallet to be issued. | ||
| + | |||
| + | Note: While you are in the '''Issue Qty''' field, you can press Ctrl-S, and go to the [[GX:Scale Window|Scale Window]] to enter the weight information, if desired. | ||
| + | |||
| + | [[Image:GX_ItemIssue_AllDetails_102.jpg|500px|Image:GX_ItemIssue_AllDetails_102.jpg|500px]] | ||
| + | |||
| + | When you are finished, press "<ISSUE>" to issue the item to production. A confirmation message may appear, depending on how your window settings are configured. | ||
| + | |||
| + | |||
| + | [[Image:ItemIssue5.gif|500px|Image:ItemIssue5.gif|500px]] | ||
| + | |||
| + | |||
| + | Press "Enter" to continue. | ||
| + | |||
| + | The focus will return to the '''Track #''' field in preparation for issuing another item. | ||
| + | |||
| + | |||
| + | When you have finished Issuing Items to production, select the "<Back>" button, or press "Esc", to return to the Production Menu. | ||
| − | + | ==[[GX:Item Issue Window Settings|Item Issue Window Settings]]== | |
Latest revision as of 14:50, 1 August 2012
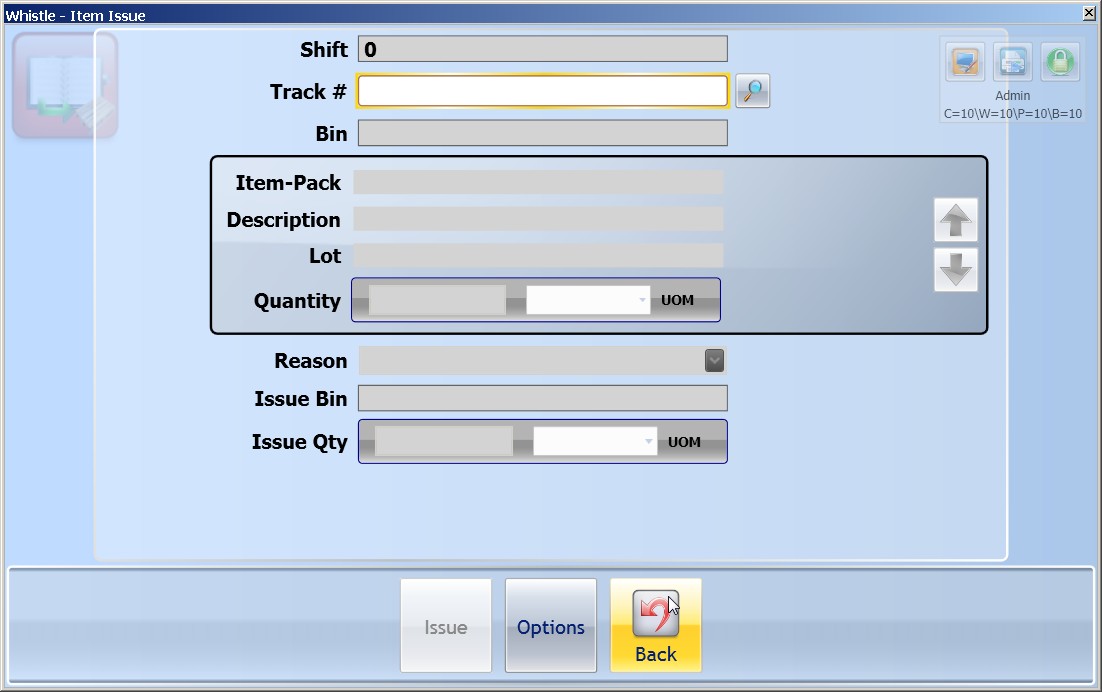
This screen is for issuing items to production. Select "Item Issue" from the Production Menu.
Issuing Items
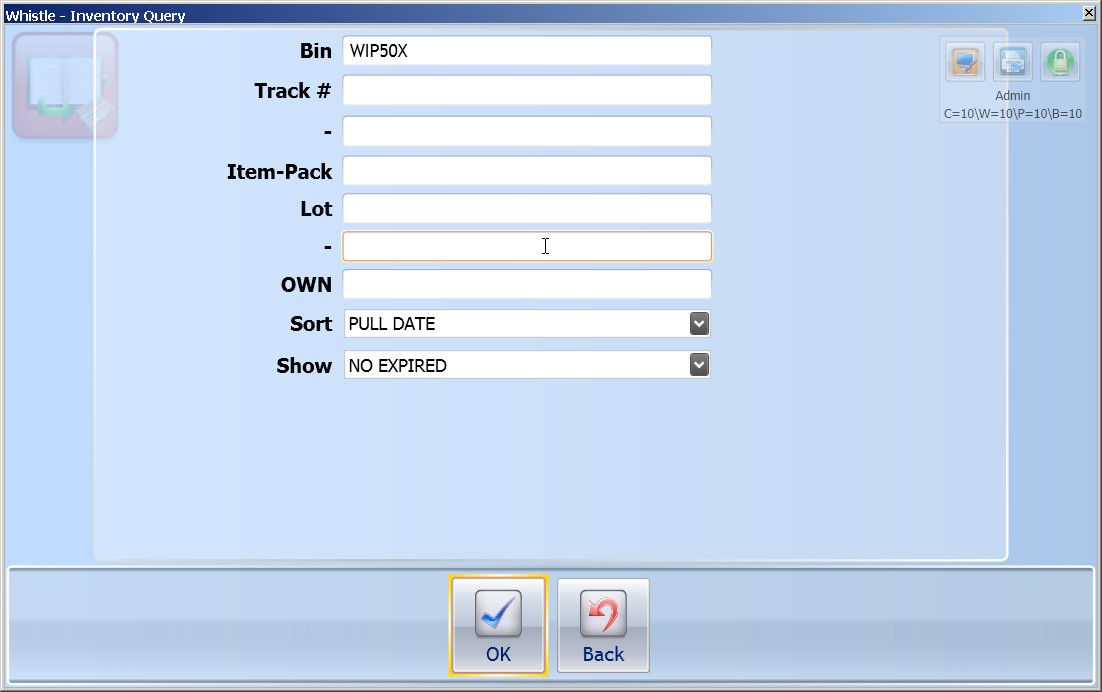
Enter the Track #, either by typing it in, scanning a pallet label, or selecting a pallet from a list by pressing the "Ctrl" and "A" keys while the Track # field is highlighted (Find Inventory). Several fields will be filled in with the track data. Focus will be on the Bin # field.
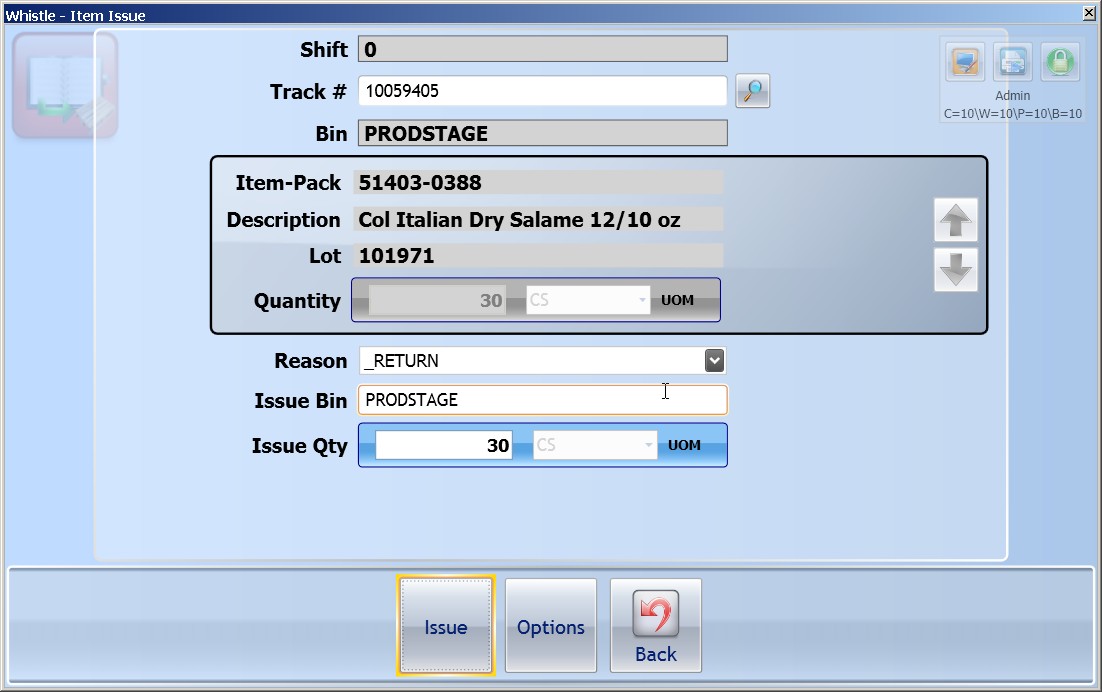
If there is more than one item on the track, up and down arrows will appear on the right side of the screen. Use the "A" and "Z" keys to scroll between the items. Select the item that you would like to issue, and leave the field by pressing "Enter", an arrow key, or the tab key. You will then be on the Dtl Code (Reason) field.
Fill in the rest of the fields. If you are issuing an entire pallet, you can either enter the pallet quantity in the Issue Qty field, or leave it blank. This will cause the entire pallet to be issued.
Note: While you are in the Issue Qty field, you can press Ctrl-S, and go to the Scale Window to enter the weight information, if desired.
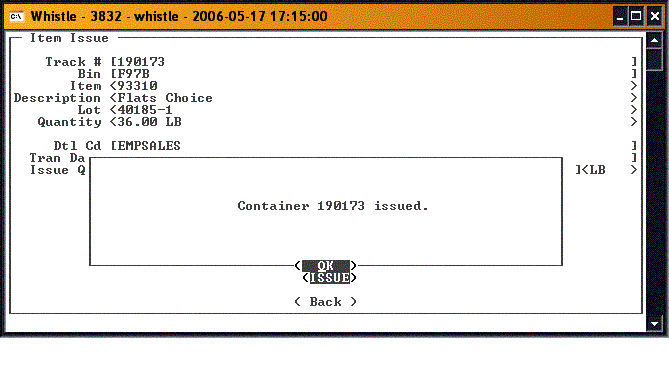
When you are finished, press "<ISSUE>" to issue the item to production. A confirmation message may appear, depending on how your window settings are configured.
Press "Enter" to continue.
The focus will return to the Track # field in preparation for issuing another item.
When you have finished Issuing Items to production, select the "<Back>" button, or press "Esc", to return to the Production Menu.


