Difference between revisions of "GS:Preprint Window"
| (3 intermediate revisions by 2 users not shown) | |||
| Line 1: | Line 1: | ||
This window is used to preprint labels for use when network or database activity prevents runtime work from taking place. These labels can be applied for work to continue and provide scanning ability when the network or database connectivity recovers. | This window is used to preprint labels for use when network or database activity prevents runtime work from taking place. These labels can be applied for work to continue and provide scanning ability when the network or database connectivity recovers. | ||
| − | ==Preprint labels | + | ==Preprint labels== |
| − | Enter the container # in the '''Start #''' field. You can scan in the number, manually enter it, or use the list function ( | + | Enter the container # in the '''Start #''' field. You can scan in the number, manually enter it, or use the list function ("Ctrl" and "A" keys) to use the [[GS:Find Inventory|Find Inventory]] window. |
[[Image:PrePrint1.gif|500px|Image:PrePrint1.gif|500px]] | [[Image:PrePrint1.gif|500px|Image:PrePrint1.gif|500px]] | ||
| Line 11: | Line 11: | ||
| − | Use the | + | Use the "A-Z" keys to select the printer to use to print the case labels. If you do not see the printer that you want to use in the list, go to the [[GS:Printer Window|Printer Window]] to set it up. |
| + | |||
| + | Move to the '''Copies''' field, and enter the number of copies of each label to print. | ||
[[Image:PrePrint3.gif|500px|Image:PrePrint3.gif|500px]] | [[Image:PrePrint3.gif|500px|Image:PrePrint3.gif|500px]] | ||
| − | Move to the <Print> button, and press | + | Move to the "<Print>" button, and press "Enter" when you are ready to print. |
| Line 25: | Line 27: | ||
[[Image:PrePrint5.gif|500px|Image:PrePrint5.gif|500px]] | [[Image:PrePrint5.gif|500px|Image:PrePrint5.gif|500px]] | ||
| − | Press | + | Press "Enter" to continue, and print the labels. When you are finished printing, highlight the "<Bac>" button and press "Enter", or press the "Esc" key to return to the Labels menu. |
| − | ==[[GS:Preprint Settings|Preprint Settings]]== | + | ==[[GS:Preprint Window Settings|Preprint Window Settings]]== |
Latest revision as of 17:30, 25 June 2006
This window is used to preprint labels for use when network or database activity prevents runtime work from taking place. These labels can be applied for work to continue and provide scanning ability when the network or database connectivity recovers.
Preprint labels
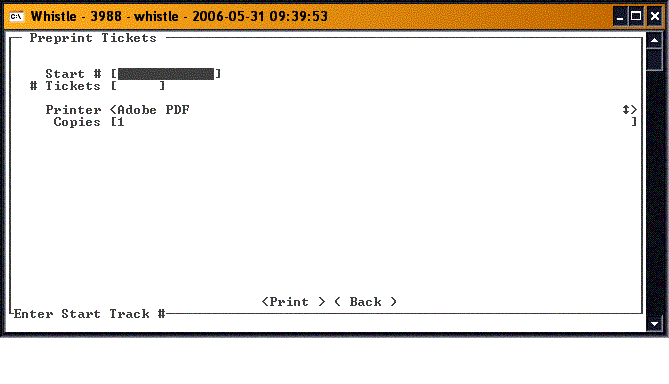
Enter the container # in the Start # field. You can scan in the number, manually enter it, or use the list function ("Ctrl" and "A" keys) to use the Find Inventory window.
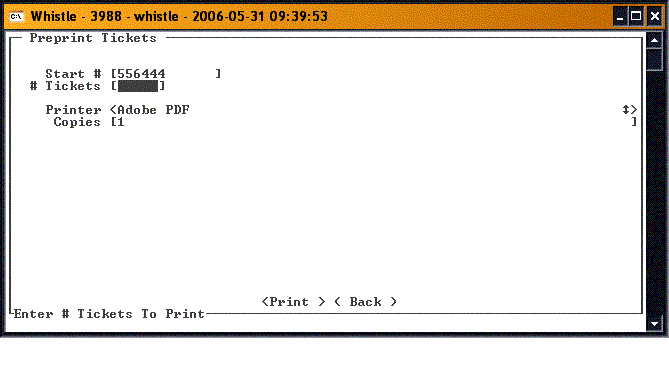
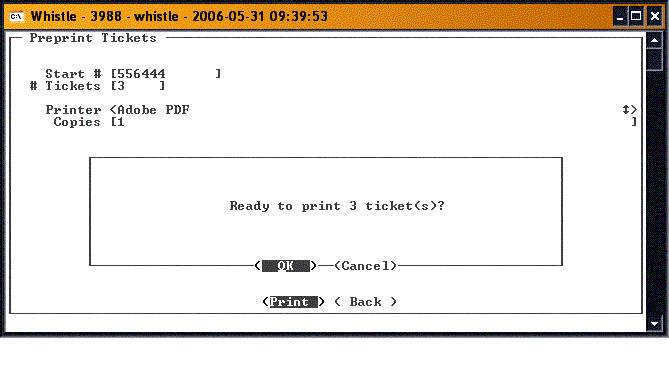
Enter the number of tickets to print. Printing will start at the track # entered in the Start # field, and will continue to print tickets in numeric order until the requested number of tickets have been printed. For this example, it will print tickets for track #s 556444, 556445, and 556446.
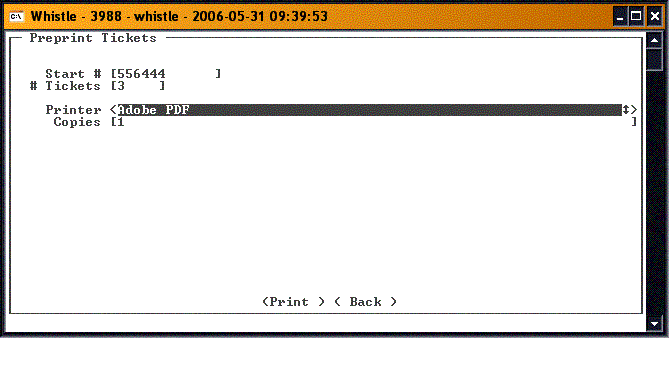
Use the "A-Z" keys to select the printer to use to print the case labels. If you do not see the printer that you want to use in the list, go to the Printer Window to set it up.
Move to the Copies field, and enter the number of copies of each label to print.
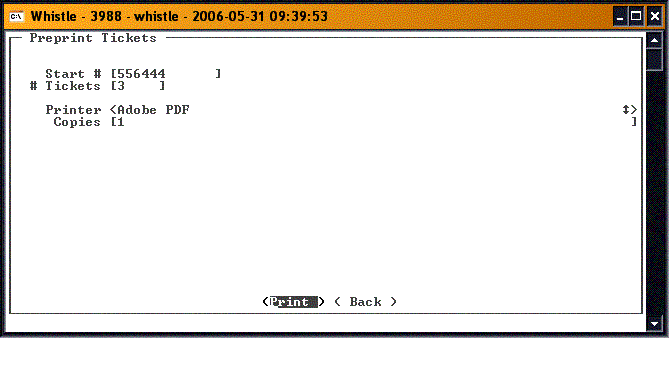
Move to the "<Print>" button, and press "Enter" when you are ready to print.
You should see the following message:
Press "Enter" to continue, and print the labels. When you are finished printing, highlight the "<Bac>" button and press "Enter", or press the "Esc" key to return to the Labels menu.
