Difference between revisions of "GX:Studio:Whistle Transaction Manager"
(→Resubmitting Transactions) |
(→Using the Tool) |
||
| (20 intermediate revisions by the same user not shown) | |||
| Line 1: | Line 1: | ||
==Introduction== | ==Introduction== | ||
[[Image:WhistleTransactionManger.PNG|thumb|640px|Image:WhistleTransactionManger.PNG|thumb|640px]] | [[Image:WhistleTransactionManger.PNG|thumb|640px|Image:WhistleTransactionManger.PNG|thumb|640px]] | ||
| + | |||
The Whistle Transaction Manger tool is used for viewing and managing Whistle transactions. This includes but isn't limited to backflush and Whistle GX transactions. Transactions flow through what are known as "database queues". Once a transaction is posted to the "Main" database queue, the resident Whistle Server will pick it up and attempt to process it. If the transaction is successful, it gets moved to the "Done" queue. Unsuccessful transactions are moved to the "Error" queue. | The Whistle Transaction Manger tool is used for viewing and managing Whistle transactions. This includes but isn't limited to backflush and Whistle GX transactions. Transactions flow through what are known as "database queues". Once a transaction is posted to the "Main" database queue, the resident Whistle Server will pick it up and attempt to process it. If the transaction is successful, it gets moved to the "Done" queue. Unsuccessful transactions are moved to the "Error" queue. | ||
| Line 9: | Line 10: | ||
==Using the Tool== | ==Using the Tool== | ||
| − | The tool is broken up into three different UI sections: Queue Selection, Queue | + | The tool is broken up into three different UI sections: Queue Selection, Queue Transaction Entries and the Queue Transaction Entry Details. The amount of screen real estate each UI section occupies can be customized by using the gold grid-splitters. Mouse over a grid-splitter and drag to customize how the screen gets divided. |
===Queue Selection=== | ===Queue Selection=== | ||
| Line 18: | Line 19: | ||
Each queue owner listed contains the three queues mentioned above which transactions move between: Main, Done and Error. To view transaction entries listed for any of these queues, first expand the transaction owner node by clicking the small triangle to the left of the owner name. Then click on either Main, Done or Error to begin loading the transaction entries for the selected queue. | Each queue owner listed contains the three queues mentioned above which transactions move between: Main, Done and Error. To view transaction entries listed for any of these queues, first expand the transaction owner node by clicking the small triangle to the left of the owner name. Then click on either Main, Done or Error to begin loading the transaction entries for the selected queue. | ||
| − | ===Queue | + | ===Queue Transaction Entries=== |
The transaction entries data grid contains the list of Whistle transactions for the selected queue. | The transaction entries data grid contains the list of Whistle transactions for the selected queue. | ||
| Line 24: | Line 25: | ||
The list of transactions is ordered by transaction generation date(LocalGenerationDate column). The grid scroll bars can be used to view the entire contents of the grid if necessary. Similar to other data grids found in Coolearth Studio, the transaction entry grid supports a wide array features such as column filtering, sorting, resizing, reordering and grouping. Additionally the column chooser dialog can be accessed by clicking the small [[Image:ColumnChooser.PNG|image:ColumnChooser.PNG]] icon in the top left corner. This will bring up the column chooser dialog which allows customization over which columns are displayed. | The list of transactions is ordered by transaction generation date(LocalGenerationDate column). The grid scroll bars can be used to view the entire contents of the grid if necessary. Similar to other data grids found in Coolearth Studio, the transaction entry grid supports a wide array features such as column filtering, sorting, resizing, reordering and grouping. Additionally the column chooser dialog can be accessed by clicking the small [[Image:ColumnChooser.PNG|image:ColumnChooser.PNG]] icon in the top left corner. This will bring up the column chooser dialog which allows customization over which columns are displayed. | ||
| + | |||
| + | ====Activating Transaction Entry Records==== | ||
| + | When a row inside the transaction entries grid is activated by clicking one of its cells, the detail records and log entries are loaded in their respective grids below. The additional data is loaded asynchronously so as not to lock up the user interface. | ||
| + | |||
| + | ====Reloading Transaction Entry Records==== | ||
| + | To reload the list of transaction entry records for the currently selected queue, click the [[Image:ReloadTxRecordsButton.PNG|Image:ReloadTxRecordsButton.PNG]] button found on the ribbon toolbar above. This will fetch the most up to date transaction data from the database. Any outstanding XML changes with validation errors will be lost. | ||
====Resubmitting Transactions==== | ====Resubmitting Transactions==== | ||
| − | In certain rare cases, it may be desirable to resubmit a transaction that has fallen into the Error queue. To resubmit a transaction, simply click the [[Image:ResubmitButton.PNG]] button. Note that the [[image:ResubmitButton.PNG|image:ResubmitButton.PNG]] button. Note that the [[image:ResubmitButton.PNG]] button will only appear for transactions that are in the Error queue. In some cases it may be necessary to first edit the XML payload of a transaction before resubmitting it. This is explained in the next section. | + | In certain rare cases, it may be desirable to resubmit a transaction that has fallen into the Error queue. To resubmit a transaction, simply click the [[Image:ResubmitButton.PNG]] button. Note that the [[image:ResubmitButton.PNG|image:ResubmitButton.PNG]] button. Note that the [[image:ResubmitButton.PNG]] button will only appear for transactions that are in the Error queue. When a transaction gets resubmitted, it is moved out of the Error queue and back into the Main queue for reprocessing by the Whistle Server. In some cases it may be necessary to first edit the XML payload of a transaction before resubmitting it. This is explained in the next section. |
====XML Grid Cells==== | ====XML Grid Cells==== | ||
| Line 37: | Line 44: | ||
[[Image:XMLAdorner.PNG|image:XMLAdorner.PNG]] | [[Image:XMLAdorner.PNG|image:XMLAdorner.PNG]] | ||
| + | To close the adorner, click the [[Image:XMLAdornerCloseButton.PNG|image:XMLAdornerCloseButton.PNG]] button. Clicking somewhere else or causing the focus to move will also cause the adorner to close. | ||
| + | |||
| + | Normally, text in the XML editor is read-only. The text can be selected but not changed. However payload XML for transaction entries in the Error queue is editable. As the XML is edited, validation logic runs in the background to determine if the text is valid XML. When a validation error is encountered, a status bar is displayed with error text for the first error encountered. | ||
| + | |||
| + | [[Image:InvalidXML.PNG|Image:InvalidXML.PNG]] | ||
| + | |||
| + | In the example above, the XML is invalid because the closing tag for <Guid> is invalid. Notice the error message points to the specific line/character position number and attempts to provide hints to the source of the error. | ||
| + | |||
| + | When the adorner is closed, if changes have been made to the XML and it passes validation, the changes are committed to the transaction record. If the edited XML has validation errors and the adorner is closed, the changes will remain in the local working copy but not be committed to the transaction record. Cells that contain invalid XML are represented with a red border and background. | ||
| + | |||
| + | [[Image:InvalidXMLCell.PNG|Image:InvalidXMLCell.PNG]] | ||
| + | |||
| + | ===Queue Transaction Entry Details=== | ||
| + | The bottom portion of the screen is dedicated to displaying details for the currently selected record in the transaction entries grid. A tab control contains two grids: the transaction details grid and the log entries grid. | ||
| + | ===Transaction Details Grid=== | ||
| + | [[Image:TransactionDetailsGrid.PNG|Image:TransactionDetailsGrid.PNG]] | ||
| + | The transaction details grid contains one or more records providing additional information about the selected transaction. Notice in the screenshot above, the reason this particular backflush transaction failed was because there is insufficient inventory in the backflush bin. The contents of this grid are read-only. | ||
| + | ===Log Entries Grid=== | ||
| + | [[Image:LogEntriesGrid.PNG|Image:LogEntriesGrid.PNG]] | ||
| + | The log entries grid lists the records created by the Whistle Server in the wmLog table while processing the selected transaction. Log entries contain information such as the SQL executed during the transaction as well as any exceptions that may have been encountered. The ExceptionBlob column contains XML data which stores the payload information for the log entry record. The text in this XML field as well as the rest of the contents of this grid are read-only. | ||
[[GX:Category:Studio Screen|Category:Studio Screen]] | [[GX:Category:Studio Screen|Category:Studio Screen]] | ||
[[GX:Category:Tools|Category:Tools]] | [[GX:Category:Tools|Category:Tools]] | ||
Latest revision as of 11:19, 24 May 2012
Introduction
The Whistle Transaction Manger tool is used for viewing and managing Whistle transactions. This includes but isn't limited to backflush and Whistle GX transactions. Transactions flow through what are known as "database queues". Once a transaction is posted to the "Main" database queue, the resident Whistle Server will pick it up and attempt to process it. If the transaction is successful, it gets moved to the "Done" queue. Unsuccessful transactions are moved to the "Error" queue.
Accessing the Screen
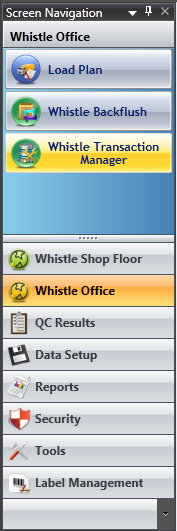
To access the screen, the user you are using will need to posses the "SD WHISTLE TRX MGR" and "SD STUDIO ACCESS" permissions. If these permissions are present in your user's profile, the screen button will appear under the "Whistle Office" Studio tab on the left. If the Whistle Transaction Manager button is pressed, the tool will load.
Using the Tool
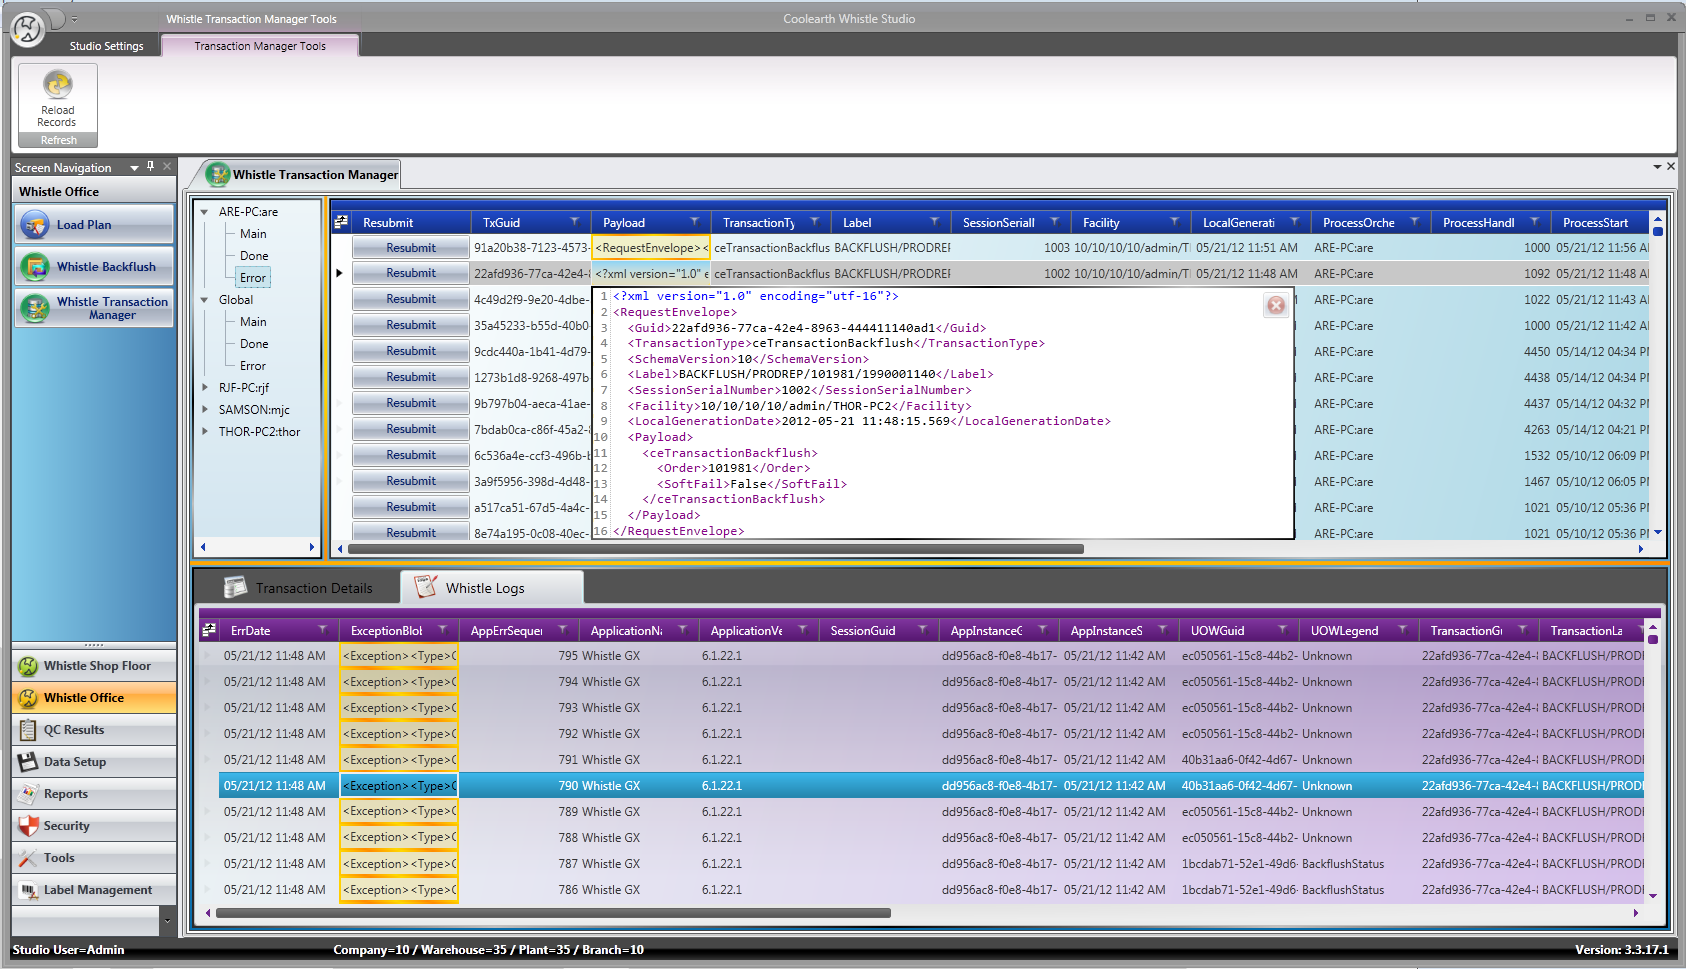
The tool is broken up into three different UI sections: Queue Selection, Queue Transaction Entries and the Queue Transaction Entry Details. The amount of screen real estate each UI section occupies can be customized by using the gold grid-splitters. Mouse over a grid-splitter and drag to customize how the screen gets divided.
Queue Selection
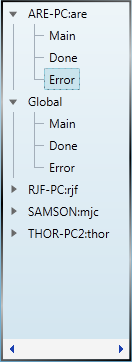
The queue selection data tree is used to display the list of database queues in the present in the system, and to select an active queue for which to view transaction entries.
Each queue owner listed contains the three queues mentioned above which transactions move between: Main, Done and Error. To view transaction entries listed for any of these queues, first expand the transaction owner node by clicking the small triangle to the left of the owner name. Then click on either Main, Done or Error to begin loading the transaction entries for the selected queue.
Queue Transaction Entries
The transaction entries data grid contains the list of Whistle transactions for the selected queue.
The list of transactions is ordered by transaction generation date(LocalGenerationDate column). The grid scroll bars can be used to view the entire contents of the grid if necessary. Similar to other data grids found in Coolearth Studio, the transaction entry grid supports a wide array features such as column filtering, sorting, resizing, reordering and grouping. Additionally the column chooser dialog can be accessed by clicking the small icon in the top left corner. This will bring up the column chooser dialog which allows customization over which columns are displayed.
Activating Transaction Entry Records
When a row inside the transaction entries grid is activated by clicking one of its cells, the detail records and log entries are loaded in their respective grids below. The additional data is loaded asynchronously so as not to lock up the user interface.
Reloading Transaction Entry Records
To reload the list of transaction entry records for the currently selected queue, click the 
Resubmitting Transactions
In certain rare cases, it may be desirable to resubmit a transaction that has fallen into the Error queue. To resubmit a transaction, simply click the button. Note that the
button. Note that the
button will only appear for transactions that are in the Error queue. When a transaction gets resubmitted, it is moved out of the Error queue and back into the Main queue for reprocessing by the Whistle Server. In some cases it may be necessary to first edit the XML payload of a transaction before resubmitting it. This is explained in the next section.
XML Grid Cells
Certain columns in the transaction entries grid and the log entries grid contain cells with XML data. These are represented as grid cells with a gold border and background.
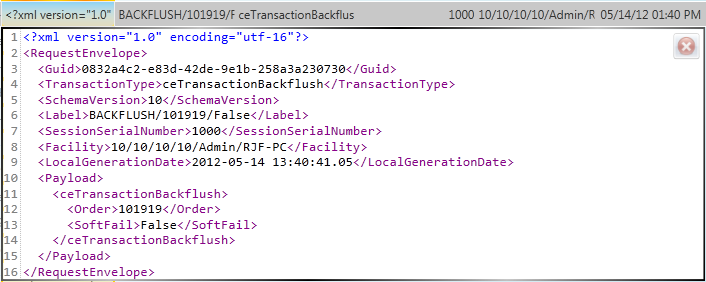
To view the XML contained within, click the cell and an XML cell adorner will appear.
To close the adorner, click the button. Clicking somewhere else or causing the focus to move will also cause the adorner to close.
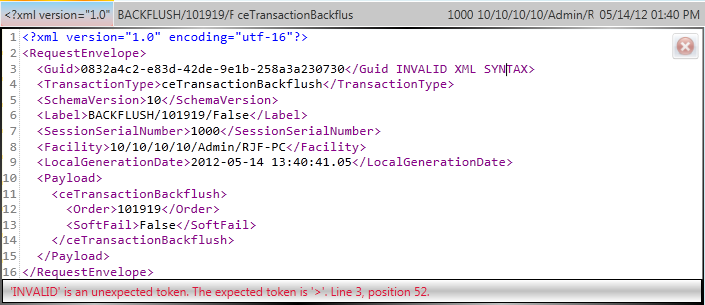
Normally, text in the XML editor is read-only. The text can be selected but not changed. However payload XML for transaction entries in the Error queue is editable. As the XML is edited, validation logic runs in the background to determine if the text is valid XML. When a validation error is encountered, a status bar is displayed with error text for the first error encountered.
In the example above, the XML is invalid because the closing tag for <Guid> is invalid. Notice the error message points to the specific line/character position number and attempts to provide hints to the source of the error.
When the adorner is closed, if changes have been made to the XML and it passes validation, the changes are committed to the transaction record. If the edited XML has validation errors and the adorner is closed, the changes will remain in the local working copy but not be committed to the transaction record. Cells that contain invalid XML are represented with a red border and background.
Queue Transaction Entry Details
The bottom portion of the screen is dedicated to displaying details for the currently selected record in the transaction entries grid. A tab control contains two grids: the transaction details grid and the log entries grid.
Transaction Details Grid
The transaction details grid contains one or more records providing additional information about the selected transaction. Notice in the screenshot above, the reason this particular backflush transaction failed was because there is insufficient inventory in the backflush bin. The contents of this grid are read-only.
Log Entries Grid
The log entries grid lists the records created by the Whistle Server in the wmLog table while processing the selected transaction. Log entries contain information such as the SQL executed during the transaction as well as any exceptions that may have been encountered. The ExceptionBlob column contains XML data which stores the payload information for the log entry record. The text in this XML field as well as the rest of the contents of this grid are read-only.
