Difference between revisions of "GX:Module Build Window"
| (One intermediate revision by the same user not shown) | |||
| Line 1: | Line 1: | ||
| − | The Module Build screen is used to create a 'kit' or 'module' out of existing Whistle-tracked inventory. Each 'kit' is one container in size, and is made up of specific amounts of different products. Each kit has | + | The Module Build screen is used to create a 'kit' or 'module' out of existing Whistle-tracked inventory. Each 'kit' is one container in size, and is made up of specific amounts of different products. Each kit has its own item and pack numbers. Kit ingredients are set up in the ERP Whistle maintenance screen. To build a kit, all of the required ingredients must be present in the same bin. |
==To build a module== | ==To build a module== | ||
| Line 13: | Line 13: | ||
..or.. | ..or.. | ||
| − | B. Press | + | B. Press "Ctrl" and "A" keys while in the '''Item #''' field. Whistle will display a list of valid module Item/Pack combos that may be entered. Select the appropriate module and press "Enter". |
| Line 35: | Line 35: | ||
Use the spacebar to toggle the '''Print''' setting on or off. If printing is activated, a new label will be printed for each container built. | Use the spacebar to toggle the '''Print''' setting on or off. If printing is activated, a new label will be printed for each container built. | ||
| − | Select | + | Select "<OK>" to complete the transaction. Whistle will prompt you if you want to proceed with the transaction. |
[[Image:Modbuild7.gif|Image:Modbuild7.gif]] | [[Image:Modbuild7.gif|Image:Modbuild7.gif]] | ||
| − | Select | + | Select "<Yes>" to proceed. |
| + | |||
| + | |||
| + | When you have finished building modules, press "<Back>" or "Esc" to return to the Production menu. | ||
| + | |||
| + | ==[[GX:Module Build Window Settings|Module Build Window Settings]]== | ||
Latest revision as of 17:46, 21 June 2006
The Module Build screen is used to create a 'kit' or 'module' out of existing Whistle-tracked inventory. Each 'kit' is one container in size, and is made up of specific amounts of different products. Each kit has its own item and pack numbers. Kit ingredients are set up in the ERP Whistle maintenance screen. To build a kit, all of the required ingredients must be present in the same bin.
To build a module
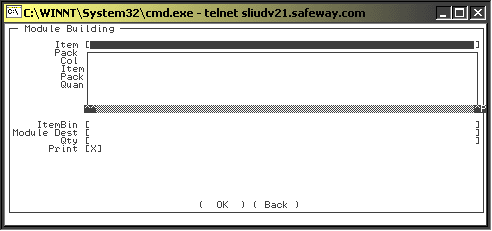
Select "Module Build" from the Production Menu.
There are two ways to enter Item/Pack information:
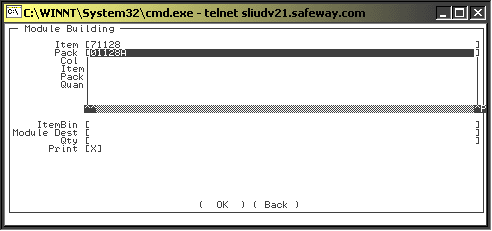
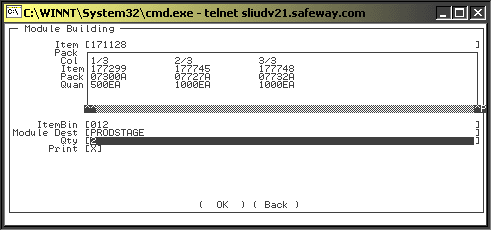
A. Enter the Item # of the module you wish to build. Next, scroll down and enter the module's Pack #.
..or..
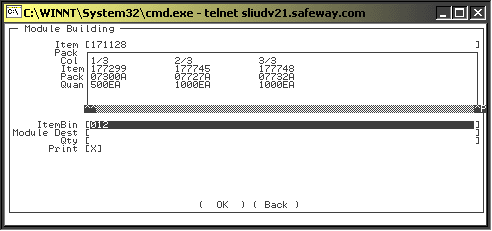
B. Press "Ctrl" and "A" keys while in the Item # field. Whistle will display a list of valid module Item/Pack combos that may be entered. Select the appropriate module and press "Enter".
Scroll to the Bin field. Enter the Bin # in which the module ingredients are located. Note that all ingredients must be present in the same bin.
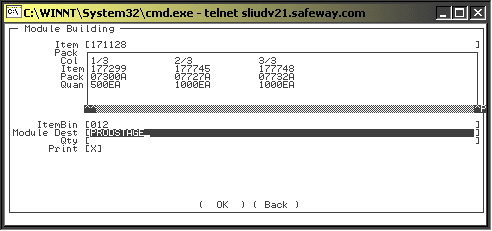
Fill in the Module Dest field with the bin # in which you would like to build the new module.
Scroll to the Quantity field. Enter the number of containers that you would like to build.
Use the spacebar to toggle the Print setting on or off. If printing is activated, a new label will be printed for each container built.
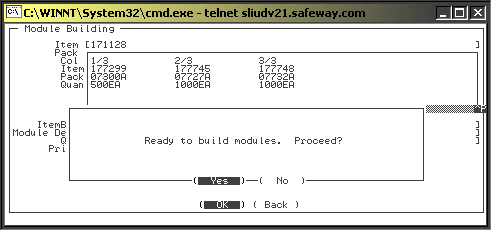
Select "<OK>" to complete the transaction. Whistle will prompt you if you want to proceed with the transaction.
Select "<Yes>" to proceed.
When you have finished building modules, press "<Back>" or "Esc" to return to the Production menu.
