Difference between revisions of "GX:Find Inventory"
| (6 intermediate revisions by 2 users not shown) | |||
| Line 1: | Line 1: | ||
| + | ==Inventory Query== | ||
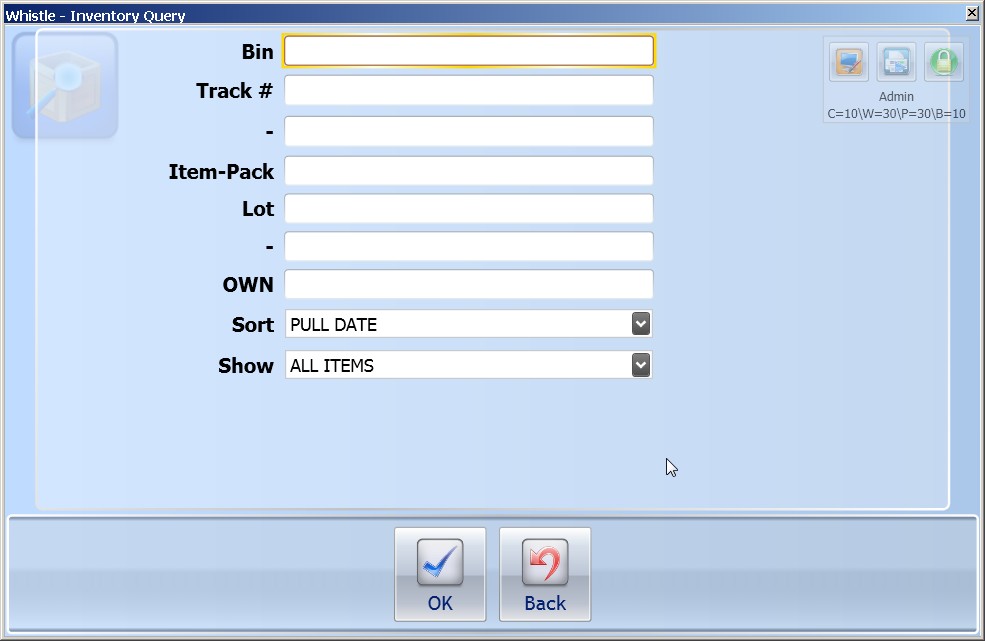
The Whistle ‘Find Inventory’ option is used to locate inventory within a warehouse using key search parameters. These might include '''Bin #''', '''Track #''', '''Item #''', '''Lot #''', or '''Pull Date'''. | The Whistle ‘Find Inventory’ option is used to locate inventory within a warehouse using key search parameters. These might include '''Bin #''', '''Track #''', '''Item #''', '''Lot #''', or '''Pull Date'''. | ||
| − | [[Image: | + | [[Image:GX_FindInventory_main_100.jpg|500px|Image:GX_FindInventory_main_100.jpg|500px]] |
| + | ==Set up search== | ||
Choose the ‘Find Inv’ option from the Inventory Menu to access this function. This function is also available on certain Track # fields throughout Whistle (Ctrl-T, Find option, or use Ctrl-A) so a user may search for a desired pallet and return its pallet number to the origin screen’s tracking field. | Choose the ‘Find Inv’ option from the Inventory Menu to access this function. This function is also available on certain Track # fields throughout Whistle (Ctrl-T, Find option, or use Ctrl-A) so a user may search for a desired pallet and return its pallet number to the origin screen’s tracking field. | ||
| Line 11: | Line 13: | ||
Enter the key search parameter(s) of your query. You may enter more than one search parameter. | Enter the key search parameter(s) of your query. You may enter more than one search parameter. | ||
| − | Select the appropriate Sort and Show criteria for your search results. Use the | + | Select the appropriate Sort and Show criteria for your search results. Use the drop downs to select the options in these fields. |
| − | The next picture is an example of a query looking for all items with track numbers between | + | The next picture is an example of a query looking for all items with track numbers between 250009843 and 250009847. The results are sorted by Pull Date, and only those without holds are displayed. |
| − | [[Image: | + | [[Image:GX_FindInventory_Filtered_101.jpg|500px|Image:GX_FindInventory_Filtered_101.jpg|500px]] |
| − | The result of the query shows there are | + | The result of the query shows there are 63 pallets that meet the query’s requirements. Use the arrow or tab keys to scroll through the query results. |
| − | [[Image: | + | [[Image:GX_FindInventory_Results_102.jpg|500px|Image:GX_FindInventory_Results_102.jpg|500px]] |
| − | This is another example, finding all of the pallets containing the item # | + | This is another example, finding all of the pallets containing the item #55028-0050, sorted by Pull Date. |
| − | [[Image: | + | [[Image:GX_FindInventory_PullDate_103.jpg|500px|Image:GX_FindInventory_PullDate_103.jpg|500px]] |
| − | There are | + | There are 63 pallets matching that criteria. |
| − | [[Image: | + | [[Image:GX_FindInventory_PullDate_results_104.jpg|500px|Image:GX_FindInventory_PullDate_results_104.jpg|500px]] |
Highlight the item and press the “Enter” key to see more details about the item(s) attached to this tracking number. | Highlight the item and press the “Enter” key to see more details about the item(s) attached to this tracking number. | ||
| − | [[Image: | + | [[Image:GX_FindInventory_PullDate_Selected_105.jpg|500px|Image:GX_FindInventory_PullDate_Selected_105.jpg|500px]] |
The details include lot number, quantities, status, pull date, production date, and the last person moving or making an adjustment to this tracking number. Each “item” on the pallet can be made the focus-item for which further information may be displayed. To cycle through the available items on a pallet - use the A-Z keys to go up and down the item list. | The details include lot number, quantities, status, pull date, production date, and the last person moving or making an adjustment to this tracking number. Each “item” on the pallet can be made the focus-item for which further information may be displayed. To cycle through the available items on a pallet - use the A-Z keys to go up and down the item list. | ||
| − | + | ==Window buttons== | |
| − | + | ===More=== | |
There is a "<MORE>" button the user may select to look at further details of the pallet. | There is a "<MORE>" button the user may select to look at further details of the pallet. | ||
| − | Another button available is the <History> button. This option allows the user to peruse the transactional history of the selected pallet. | + | [[Image:GX_FindInventory_MoreButton_106.jpg|500px|Image:GX_FindInventory_MoreButton_106.jpg|500px]] |
| + | |||
| + | |||
| + | ===History=== | ||
| + | Another button available is the "<History>" button. This option allows the user to peruse the transactional history of the selected pallet. | ||
| + | |||
| + | [[Image:GX_FindInventory_History_AddComment_107.jpg|500px|image:GX_FindInventory_History_AddComment_107.jpg|500px]] | ||
| + | |||
| + | Comments can be added to a historical transaction entry from this screen as well by filling in the '''Comment''' field and using the "<Update>" button to commit the entry. | ||
| + | |||
| + | ===View Cases=== | ||
The last button on this screen is the "<View Cases>" button. This option will allow the user to view the individual case information for each case on the selected pallet. | The last button on this screen is the "<View Cases>" button. This option will allow the user to view the individual case information for each case on the selected pallet. | ||
| − | [[Image: | + | [[Image:GX_FindInventory_ViewCases_108.jpg|500px|Image:GX_FindInventory_ViewCases_108.jpg|500px]] |
| − | + | ||
| − | + | ||
| − | + | ||
| − | + | ||
| − | + | ||
| − | + | ||
| + | When you are finished viewing the cases, press the "Esc" button to return to the previous screen. | ||
==[[GX:Find Inventory Window Settings|Find Inventory Window Settings]]== | ==[[GX:Find Inventory Window Settings|Find Inventory Window Settings]]== | ||
Latest revision as of 08:59, 1 August 2012
Contents
Inventory Query
The Whistle ‘Find Inventory’ option is used to locate inventory within a warehouse using key search parameters. These might include Bin #, Track #, Item #, Lot #, or Pull Date.
Set up search
Choose the ‘Find Inv’ option from the Inventory Menu to access this function. This function is also available on certain Track # fields throughout Whistle (Ctrl-T, Find option, or use Ctrl-A) so a user may search for a desired pallet and return its pallet number to the origin screen’s tracking field.
To locate inventory: The ‘Find Inventory’ screen allows users to perform inventory queries using one or any combination of the search parameters listed. This function allows queries to be either very broad or quite specific.
Enter the key search parameter(s) of your query. You may enter more than one search parameter.
Select the appropriate Sort and Show criteria for your search results. Use the drop downs to select the options in these fields.
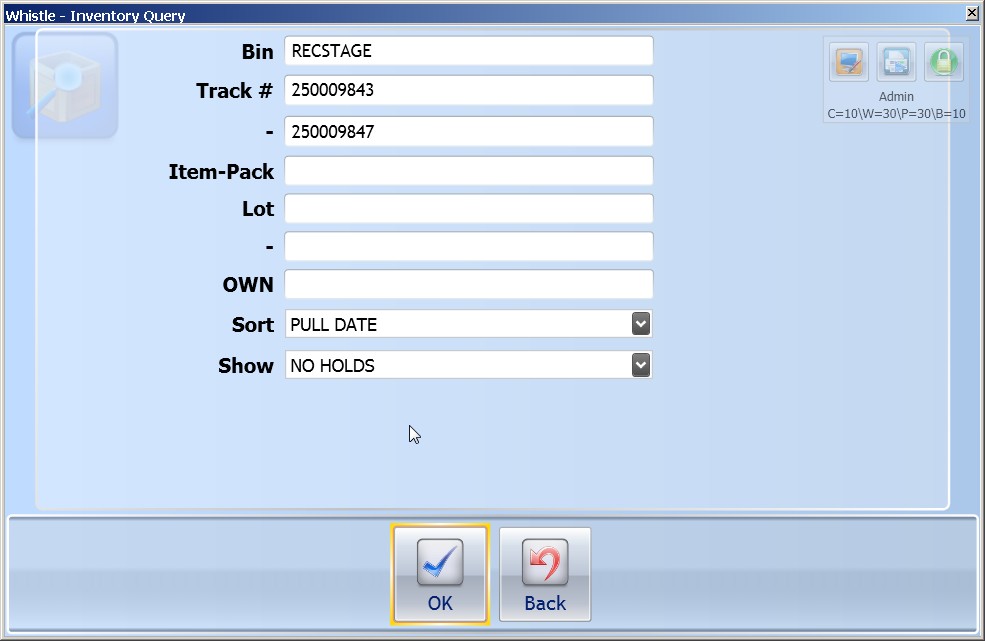
The next picture is an example of a query looking for all items with track numbers between 250009843 and 250009847. The results are sorted by Pull Date, and only those without holds are displayed.
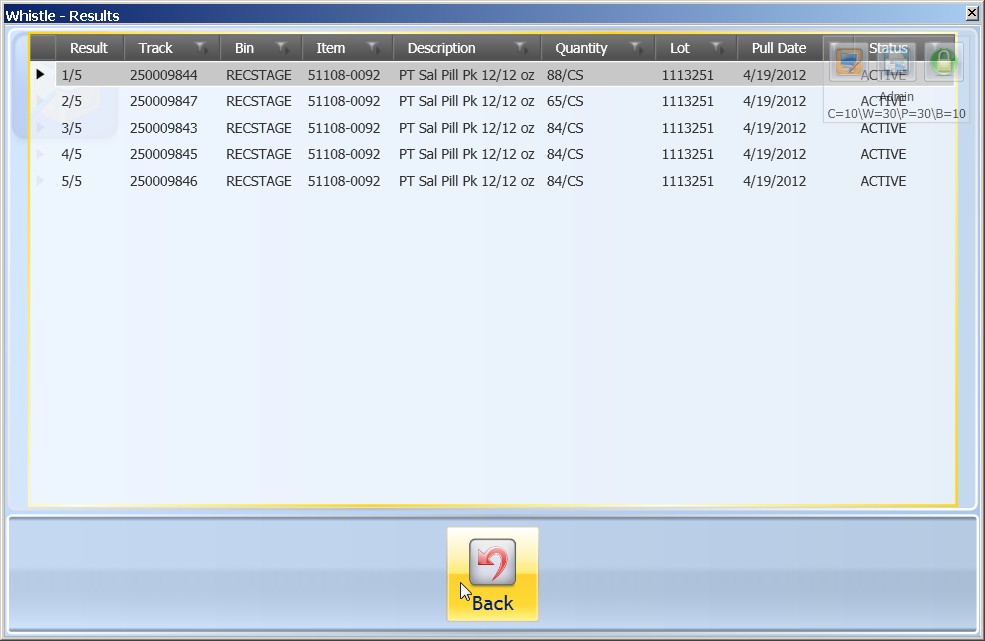
The result of the query shows there are 63 pallets that meet the query’s requirements. Use the arrow or tab keys to scroll through the query results.
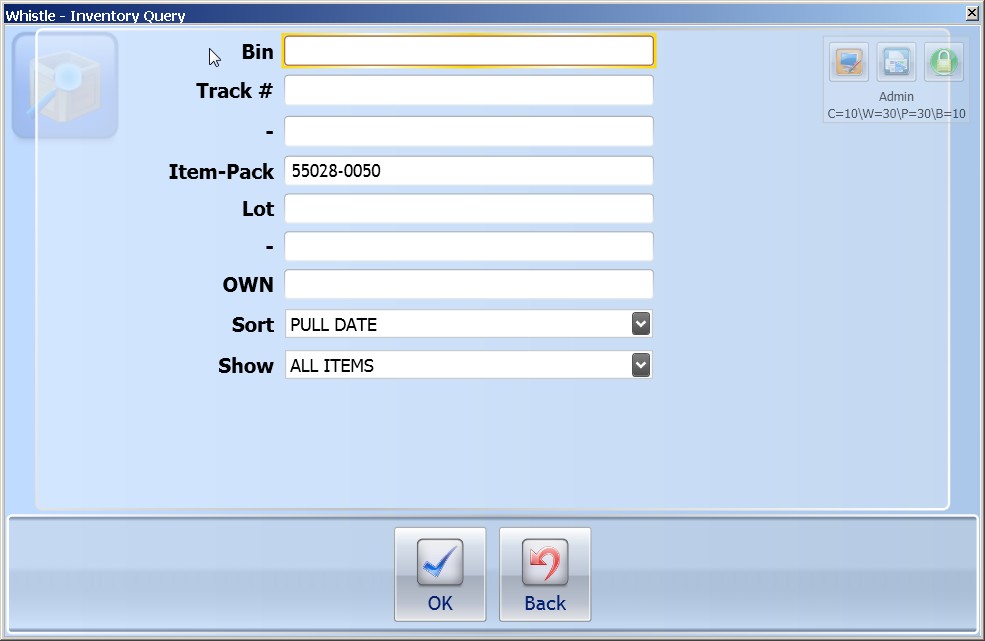
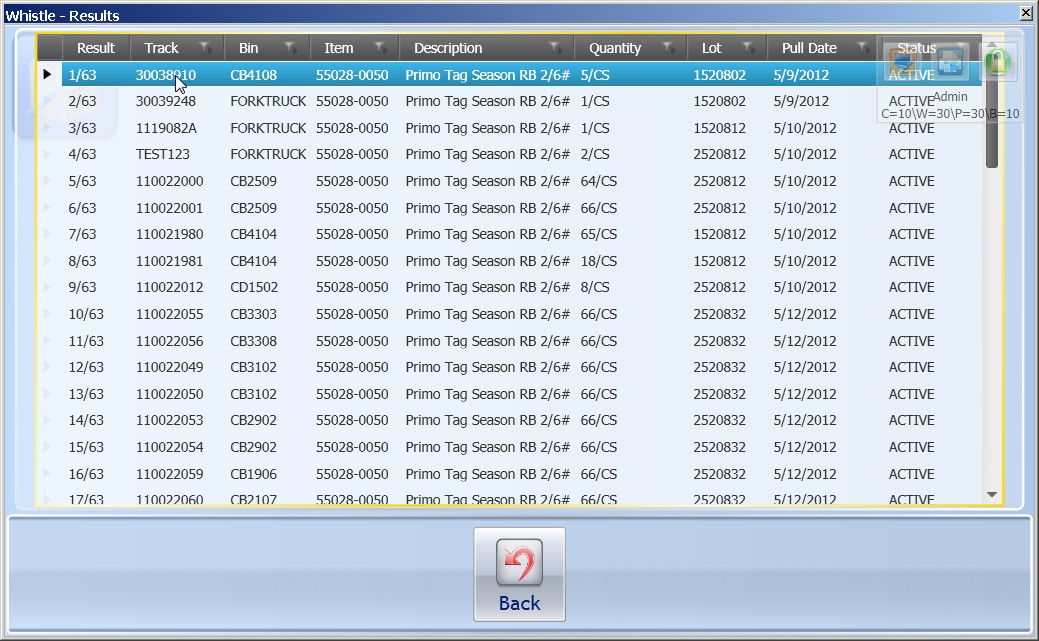
This is another example, finding all of the pallets containing the item #55028-0050, sorted by Pull Date.
There are 63 pallets matching that criteria.
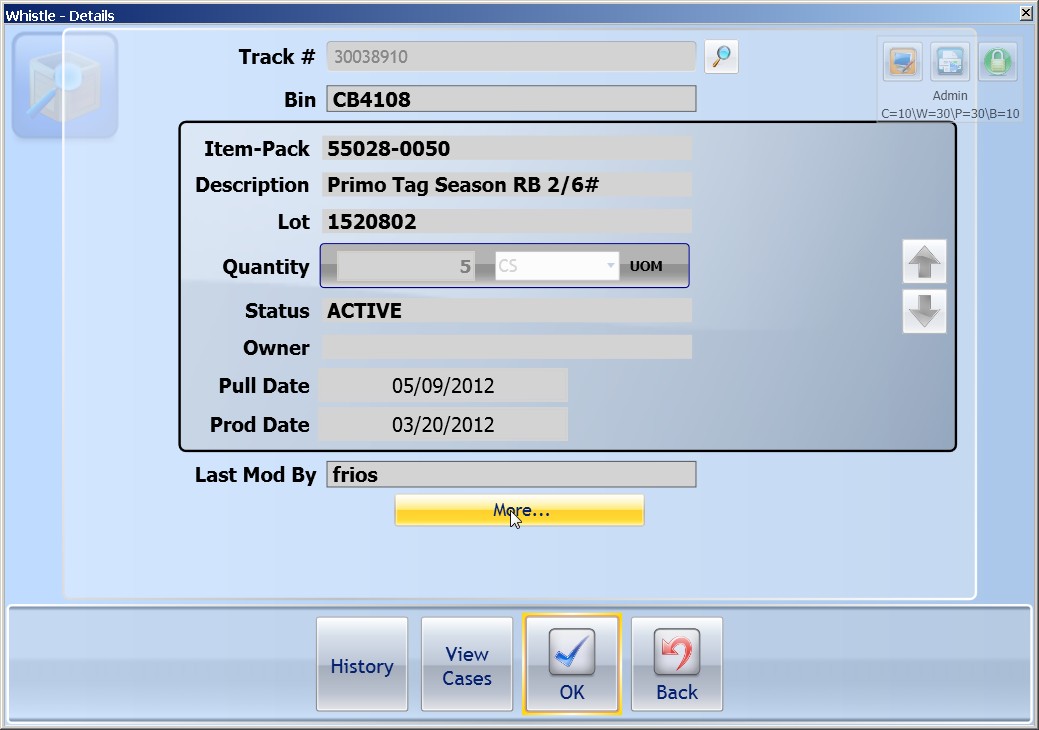
Highlight the item and press the “Enter” key to see more details about the item(s) attached to this tracking number.
The details include lot number, quantities, status, pull date, production date, and the last person moving or making an adjustment to this tracking number. Each “item” on the pallet can be made the focus-item for which further information may be displayed. To cycle through the available items on a pallet - use the A-Z keys to go up and down the item list.
Window buttons
More
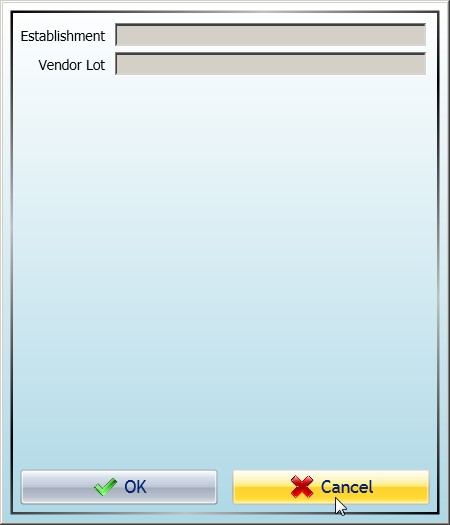
There is a "<MORE>" button the user may select to look at further details of the pallet.
History
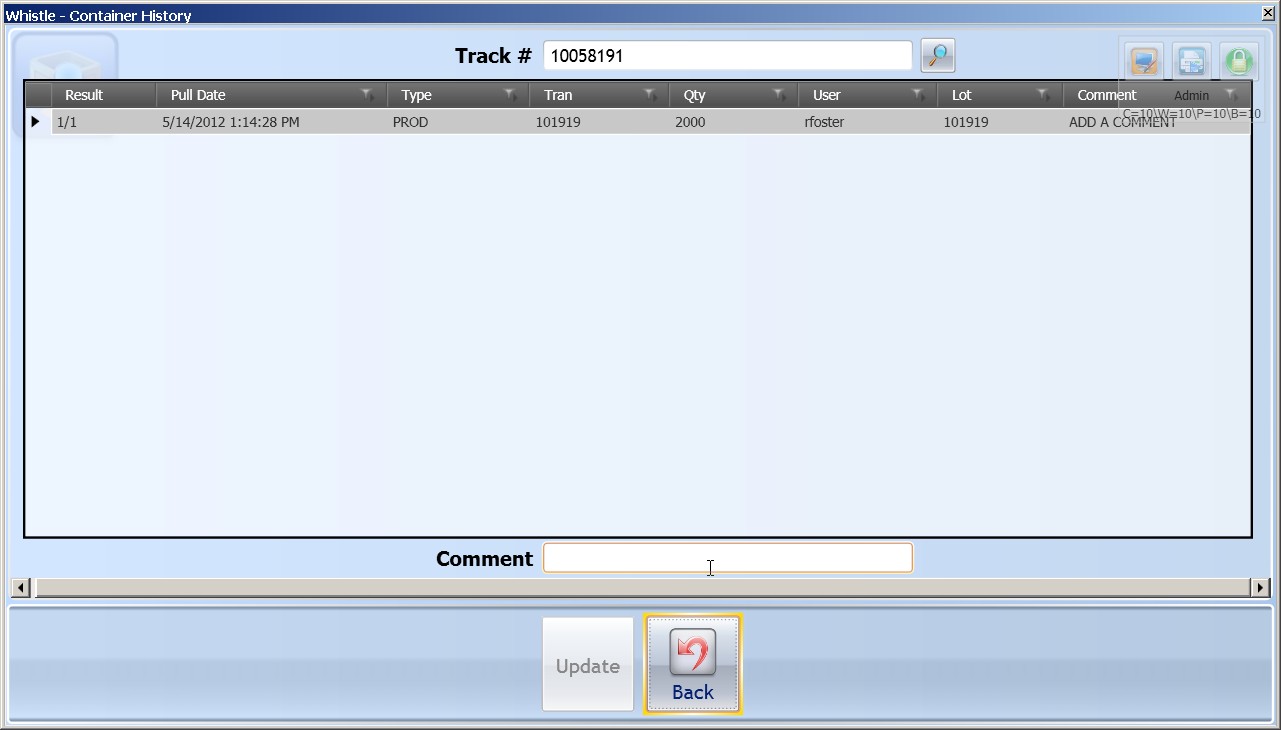
Another button available is the "<History>" button. This option allows the user to peruse the transactional history of the selected pallet.
Comments can be added to a historical transaction entry from this screen as well by filling in the Comment field and using the "<Update>" button to commit the entry.
View Cases
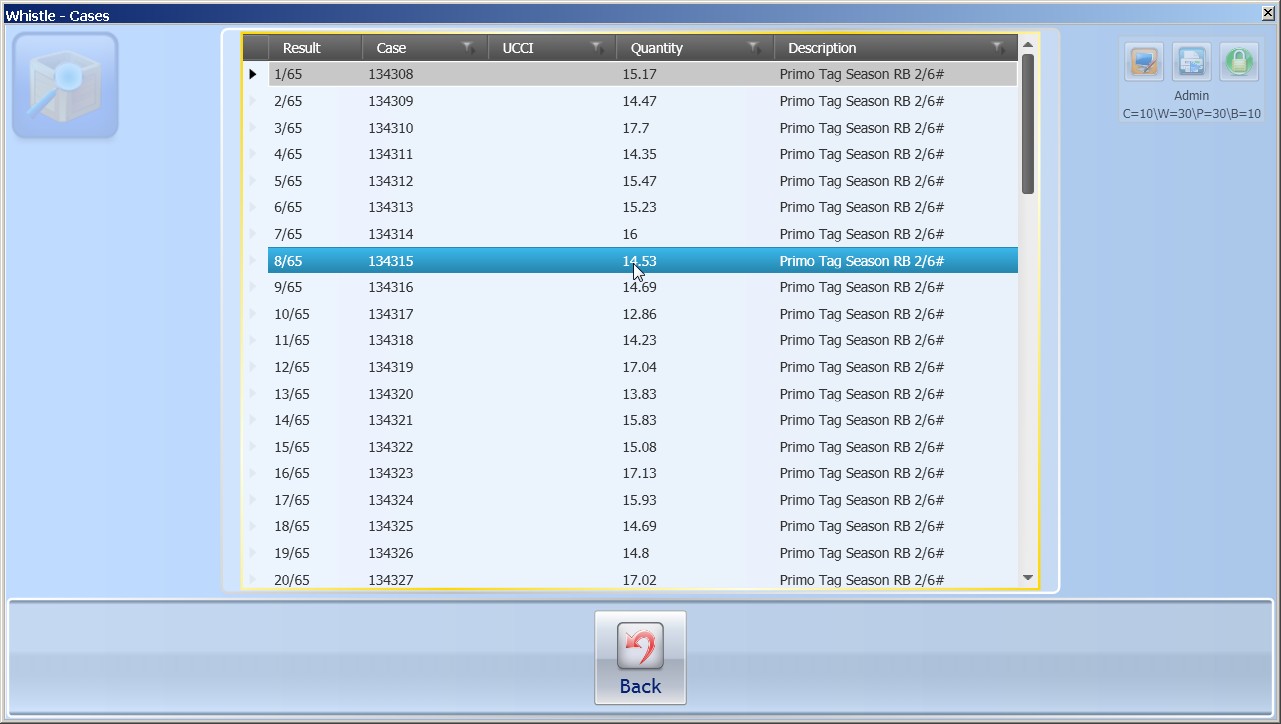
The last button on this screen is the "<View Cases>" button. This option will allow the user to view the individual case information for each case on the selected pallet.
When you are finished viewing the cases, press the "Esc" button to return to the previous screen.
