Difference between revisions of "GT:Case Report Window"
| (13 intermediate revisions by the same user not shown) | |||
| Line 1: | Line 1: | ||
| − | + | This window is used to palletize loose cases. | |
| + | |||
| + | |||
| + | [[Image:CaseReport1.gif|500px|Image:CaseReport1.gif|500px]] | ||
| + | |||
| + | ==Case Reporting== | ||
| + | Scan in the case label. This is the last case in the list of cases to be put on a pallet. For example, if you wish to put 50 cases of the same item on a pallet, then you would scan the label on the 50th case. Whistle will parse the information contained in the label, and fill the data into the appropriate fields on the screen. Focus will be set on the '''Quantity''' field. | ||
| + | |||
| + | [[Image:CaseReport2.gif|500px|Image:CaseReport2.gif|500px]] | ||
| + | |||
| + | Change the quantity if necessary. This is the number of loose cases of this item that are available to be palletized. For example, if there are 100 cases available and you are going to palletize 24 of them, you need to scan in the label of the 24th case, and put the number 24 in the quantity field. If you scan in the label of the 100th case, and put in the number 25 in the quantity field, you will get an error. | ||
| + | |||
| + | When you are ready to report production of this case, highlight the "<OK>" button, and press the "Enter" key. | ||
| + | |||
| + | |||
| + | [[Image:CaseReport3.gif|500px|Image:CaseReport3.gif|500px]] | ||
| + | |||
| + | |||
| + | A confirmation message will appear to let you know that the production was successfully reported, and the pallet was successfully created. | ||
| + | |||
| + | [[Image:CaseReport4.gif|500px|Image:CaseReport4.gif|500px]] | ||
| + | |||
| + | |||
| + | After reporting on a case, the focus will return to the '''Case''' field, ready to scan in or otherwise enter the label of another case. | ||
| + | |||
| + | When you have finished, select either "<Back>" or "Esc" to return to the Production menu. | ||
| + | |||
| + | ==Options Menu== | ||
| + | On the bottom left hand corner of the window is an Options button. Highlighting this button and pressing "Enter" will bring up the Options menu. If you do not first select an Item, you will see this informational message. | ||
| + | |||
| + | [[Image:CaseReportOption1.gif|500px|Image:CaseReportOption1.gif|500px]] | ||
| + | |||
| + | Press "Enter" to continue on to the Options menu. | ||
| + | |||
| + | |||
| + | [[Image:CaseReportOption2.gif|500px|Image:CaseReportOption2.gif|500px]] | ||
| + | |||
| + | ===Delete Case=== | ||
| + | Select "Delete Case" from the <Options> button at the bottom of the screen. You will be taken to the Delete Case window. | ||
| + | |||
| + | [[Image:CaseReportDelete1.gif|500px|Image:CaseReportDelete1.gif|500px]] | ||
| + | |||
| + | Scan in the label of the case to be deleted. Again, Whistle will parse the information contained in the label, and plug the data into the appropriate fields on the screen. Focus will be on the "<Delete>" button | ||
| + | |||
| + | [[Image:CaseReportDelete2.gif|500px|Image:CaseReportDelete2.gif|500px]] | ||
| + | |||
| + | |||
| + | Press "Enter" to delete the case. A message will display, asking you to confirm that you wish to delete this case. | ||
| + | |||
| + | [[Image:CaseReportDelete3.gif|500px|Image:CaseReportDelete3.gif|500px]] | ||
| + | |||
| + | |||
| + | Press "Enter" to continue and delete the case. | ||
| + | |||
| + | After deleting a case, all the data on the screen will be cleared, and focus to go to the "<Back>" button. | ||
| + | |||
| + | [[Image:CaseReportDelete4.gif|500px|Image:CaseReportDelete4.gif|500px]] | ||
| + | |||
| + | |||
| + | If you are done deleting cases, press "Enter" while the "<Back>" button is highlighted, or press "Esc" to return to the Case Report window. Or, you can tab or arrow up to the Case field, and delete another case. | ||
| + | |||
| + | ===Show Loose Cases=== | ||
| + | Select "Show Loose Cases" from the "<Options>" button at the bottom of the screen. You will be taken to a screen that displays all of the loose cases in the system, that is, all the cases not assigned to a particular pallet. | ||
| + | |||
| + | [[Image:CaseReportLoose.gif|500px|Image:CaseReportLoose.gif|500px]] | ||
| + | |||
| + | Press "Esc" to return to the Case Report window. | ||
| + | |||
| + | |||
| + | ;NOTE: There are no window settings for this window. | ||
Latest revision as of 17:35, 21 June 2006
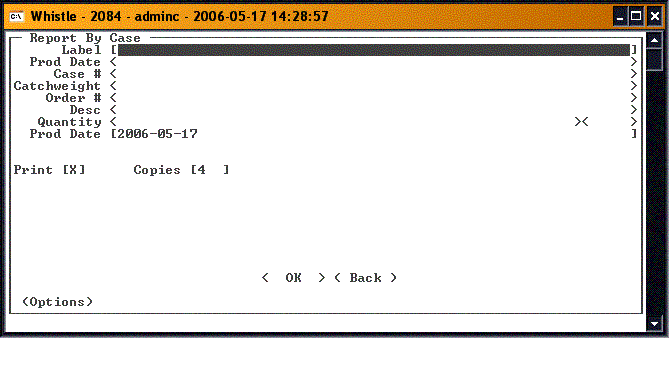
This window is used to palletize loose cases.
Case Reporting
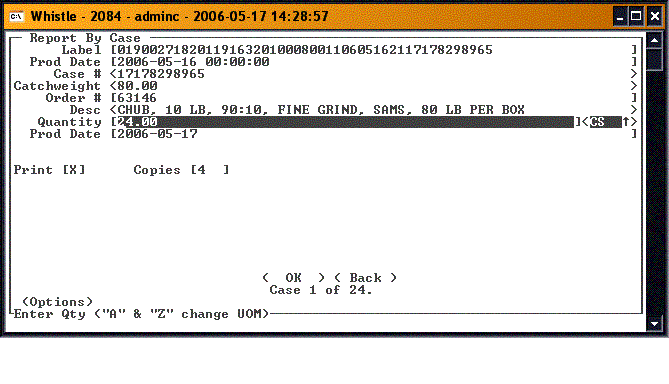
Scan in the case label. This is the last case in the list of cases to be put on a pallet. For example, if you wish to put 50 cases of the same item on a pallet, then you would scan the label on the 50th case. Whistle will parse the information contained in the label, and fill the data into the appropriate fields on the screen. Focus will be set on the Quantity field.
Change the quantity if necessary. This is the number of loose cases of this item that are available to be palletized. For example, if there are 100 cases available and you are going to palletize 24 of them, you need to scan in the label of the 24th case, and put the number 24 in the quantity field. If you scan in the label of the 100th case, and put in the number 25 in the quantity field, you will get an error.
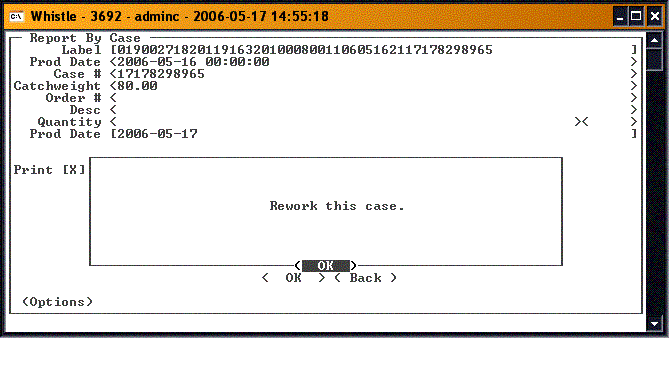
When you are ready to report production of this case, highlight the "<OK>" button, and press the "Enter" key.
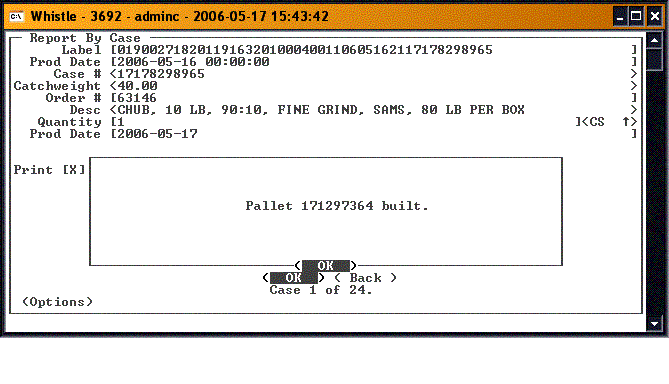
A confirmation message will appear to let you know that the production was successfully reported, and the pallet was successfully created.
After reporting on a case, the focus will return to the Case field, ready to scan in or otherwise enter the label of another case.
When you have finished, select either "<Back>" or "Esc" to return to the Production menu.
Options Menu
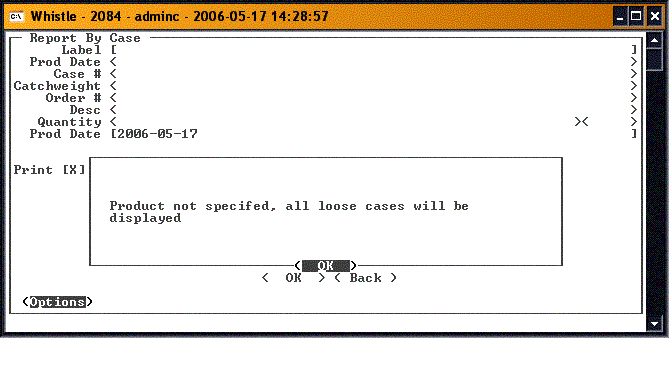
On the bottom left hand corner of the window is an Options button. Highlighting this button and pressing "Enter" will bring up the Options menu. If you do not first select an Item, you will see this informational message.
Press "Enter" to continue on to the Options menu.
Delete Case
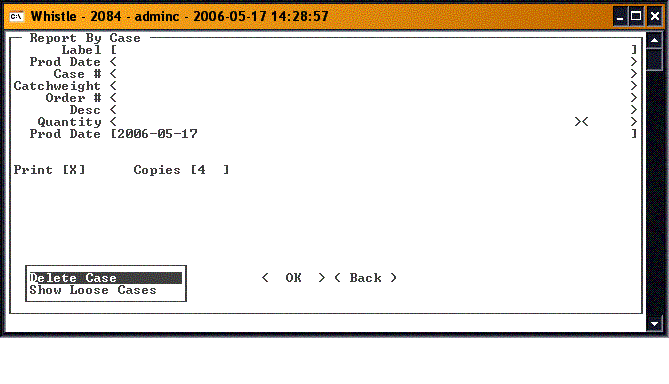
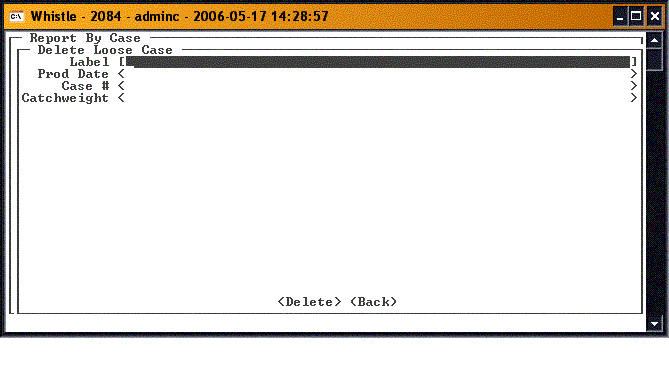
Select "Delete Case" from the <Options> button at the bottom of the screen. You will be taken to the Delete Case window.
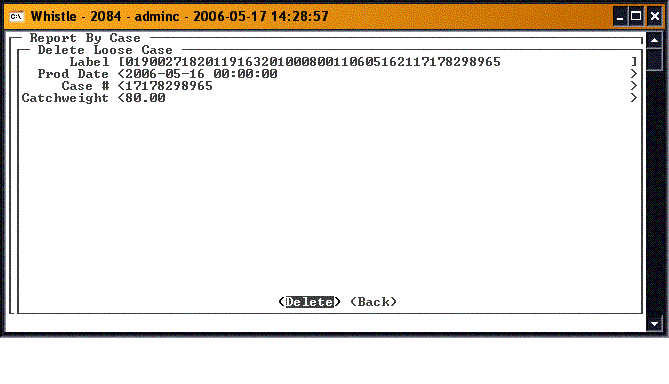
Scan in the label of the case to be deleted. Again, Whistle will parse the information contained in the label, and plug the data into the appropriate fields on the screen. Focus will be on the "<Delete>" button
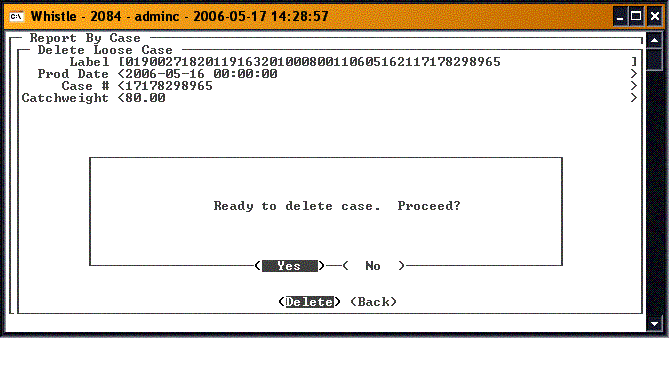
Press "Enter" to delete the case. A message will display, asking you to confirm that you wish to delete this case.
Press "Enter" to continue and delete the case.
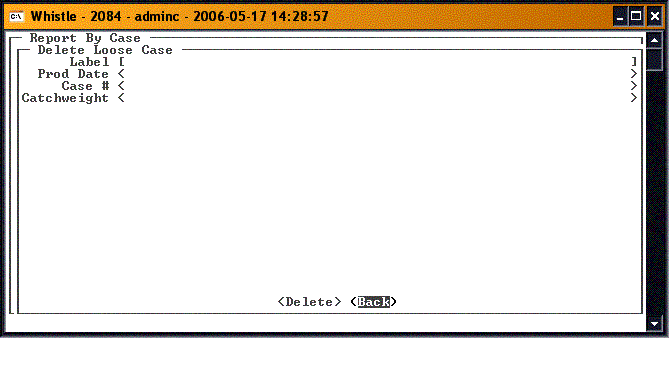
After deleting a case, all the data on the screen will be cleared, and focus to go to the "<Back>" button.
If you are done deleting cases, press "Enter" while the "<Back>" button is highlighted, or press "Esc" to return to the Case Report window. Or, you can tab or arrow up to the Case field, and delete another case.
Show Loose Cases
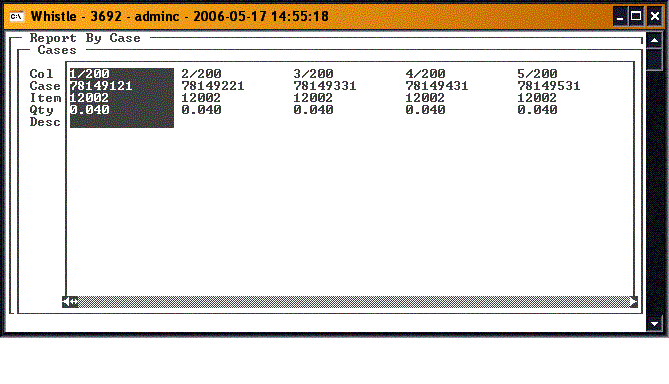
Select "Show Loose Cases" from the "<Options>" button at the bottom of the screen. You will be taken to a screen that displays all of the loose cases in the system, that is, all the cases not assigned to a particular pallet.
Press "Esc" to return to the Case Report window.
- NOTE
- There are no window settings for this window.
