Difference between revisions of "GS:Delete Pallet"
| (One intermediate revision by the same user not shown) | |||
| Line 3: | Line 3: | ||
==How to Delete a Pallet== | ==How to Delete a Pallet== | ||
| − | The | + | The Reason field is required to be filled in. The only allowed method of filling the Reason field is to select one of the Reasons listed in the drop-down list. |
[[Image:DeletePallet1.gif|400px|Image:DeletePallet1.gif|400px]] | [[Image:DeletePallet1.gif|400px|Image:DeletePallet1.gif|400px]] | ||
| − | + | A Comment may be added if you want (this field is not required), and the pallet is then entered, either by scanning or manual entry. Or, as usual with a Track field, pressing the "Ctrl" and "A" keys will bring up a [[GS:Find Inventory|Find Inventory]] window, to allow the user to browse to find the correct pallet to be deleted. | |
| − | After all the criteria has been selected, highlight the <Delete> button, and press | + | After all the criteria has been selected, highlight the "<Delete>" button, and press "Enter". A confirmation dialog may come up, depending upon how your window settings were set. |
[[Image:DeletePallet2.gif|400px|Image:DeletePallet2.gif|400px]] | [[Image:DeletePallet2.gif|400px|Image:DeletePallet2.gif|400px]] | ||
| − | Press | + | Press "Enter" to clear this message, or tab to the "<No>" option on the dialog box, if you don't want to delete this pallet. |
[[Image:DeletePallet3.gif|400px|Image:DeletePallet3.gif|400px]] | [[Image:DeletePallet3.gif|400px|Image:DeletePallet3.gif|400px]] | ||
| − | Again, depending on your settings, a success message may be displayed. | + | Again, depending on your window settings, a success message may be displayed. |
[[Image:DeletePallet4.gif|400px|Image:DeletePallet4.gif|400px]] | [[Image:DeletePallet4.gif|400px|Image:DeletePallet4.gif|400px]] | ||
| − | Press <OK> to continue. | + | Press "<OK>" to continue. |
| − | The user can then delete another pallet, or hit " | + | The user can then delete another pallet, or hit "Esc" or highlight the "<Back>" button and press "Enter" to return to the Inventory menu. |
;Note: There are no window settings for this window. | ;Note: There are no window settings for this window. | ||
Latest revision as of 13:48, 16 June 2006
The “Delete Pallet” option of the Inventory menu is used to remove pallet information from Whistle.
How to Delete a Pallet
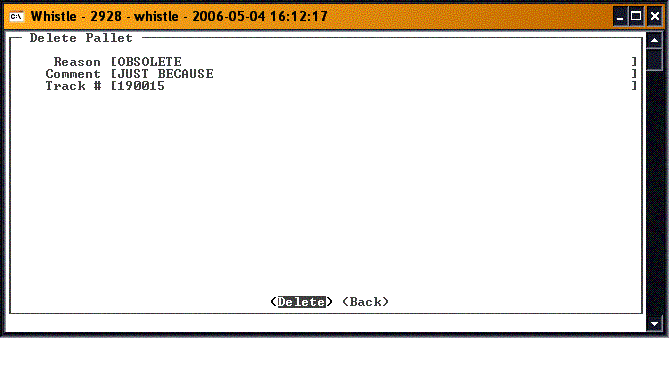
The Reason field is required to be filled in. The only allowed method of filling the Reason field is to select one of the Reasons listed in the drop-down list.
A Comment may be added if you want (this field is not required), and the pallet is then entered, either by scanning or manual entry. Or, as usual with a Track field, pressing the "Ctrl" and "A" keys will bring up a Find Inventory window, to allow the user to browse to find the correct pallet to be deleted.
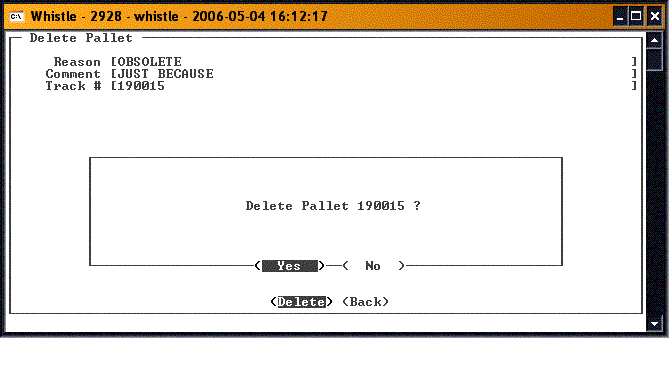
After all the criteria has been selected, highlight the "<Delete>" button, and press "Enter". A confirmation dialog may come up, depending upon how your window settings were set.
Press "Enter" to clear this message, or tab to the "<No>" option on the dialog box, if you don't want to delete this pallet.
Again, depending on your window settings, a success message may be displayed.
Press "<OK>" to continue.
The user can then delete another pallet, or hit "Esc" or highlight the "<Back>" button and press "Enter" to return to the Inventory menu.
- Note
- There are no window settings for this window.


