Difference between revisions of "GS:Combine Pallets"
| Line 11: | Line 11: | ||
| − | Once the Source (Origin) and Destination Pallets have been selected into Whistle, the user can then tab down to the <Combine> button. Pressing <ENTER> will start the transaction | + | Once the Source (Origin) and Destination Pallets have been selected into Whistle, the user can then tab down to the <Combine> button. Pressing <ENTER> will start the transaction. |
| + | |||
| + | [[Image:CombinePallets1.gif|500px|Image:CombinePallets1.gif|500px]] | ||
| + | |||
Pressing <ENTER> will commit the transaction and you will be returned a success message box upon completion. | Pressing <ENTER> will commit the transaction and you will be returned a success message box upon completion. | ||
| + | [[Image:CombinePallets3.gif|500px|Image:CombinePallets3.gif|500px]] | ||
Revision as of 18:43, 15 May 2006
This Whistle screen is used to combine pallet inventory from a source pallet onto a destination pallet.
How to Combine Pallets
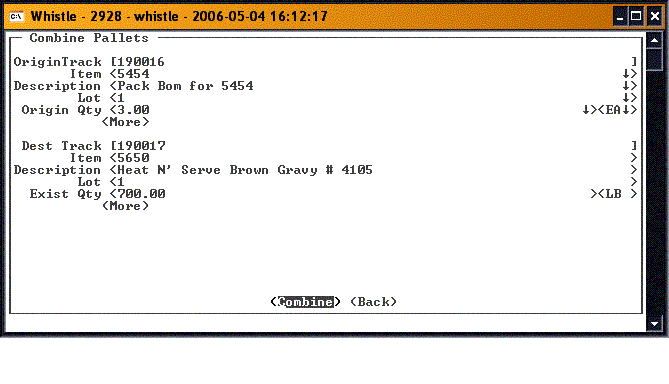
The user should arrow or tab down onto the OriginTrack field. This field will take a container pallet number from which the source inventory will be transferred. Once a pallet has been entered from either a scanner or keyboard, the specific inventory on the pallet may be selected using the A-Z keys.
Arrowing down to the <Dest Track> field will prompt the user to select the Destination Pallet. This is accomplished by scanner or keyboard as well.
Once the Source (Origin) and Destination Pallets have been selected into Whistle, the user can then tab down to the <Combine> button. Pressing <ENTER> will start the transaction.
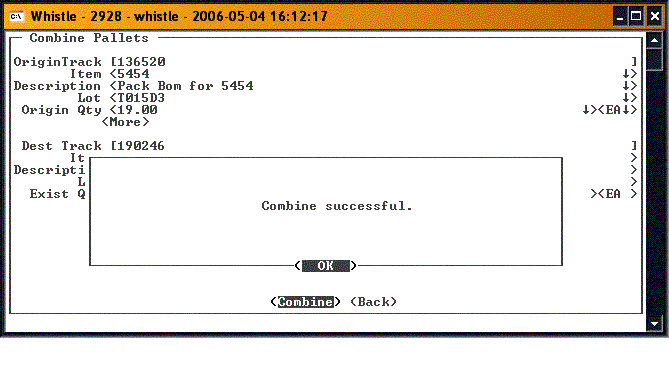
Pressing <ENTER> will commit the transaction and you will be returned a success message box upon completion.
Pallet volumes are enforced with regards to their inherent tolerances. You may overfill the destination pallet only within its tolerance level.

