Difference between revisions of "GX:Installation and Deployment"
(→Running Whistle Studio for the First Time) |
(→Running Whistle Studio for the First Time) |
||
| Line 38: | Line 38: | ||
After entering in filling in the section under "Database Credentials", enter the your Whistle/ERP user name and password into the "User Name" and "Password" fields respectively. Hit Enter or click the Login button to log in to Whistle Studio. If you are successful in logging in, Whistle Studio will save away your database credentials for the next time the application runs. Similarly if you checked the "Remember Me" check box, Whislte Studio will save away your Whistle/ERP user name and password. | After entering in filling in the section under "Database Credentials", enter the your Whistle/ERP user name and password into the "User Name" and "Password" fields respectively. Hit Enter or click the Login button to log in to Whistle Studio. If you are successful in logging in, Whistle Studio will save away your database credentials for the next time the application runs. Similarly if you checked the "Remember Me" check box, Whislte Studio will save away your Whistle/ERP user name and password. | ||
| + | |||
| + | If in the future you wish to change the database that Whistle Studio is pointed at, simply click the expansion indicator on the "Database Credentials" section and enter in the new connection settings. | ||
Revision as of 15:32, 3 February 2010
Contents
Requirements
- Windows XP / Windows Server 2003 or higher
- .Net 3.5 Service Pack 1 or higher
- ~50 MB of hard disk space
Deployment Options
Whistle Studio is can be used for maintenance of Whistle tables. It is a desktop application that runs under Windows XP/2003 or greater and requires the Microsoft .Net Framework 3.5 to be installed. The total size of the installation is around 50 megabytes of disk space. There are two different deployment strategies available – running a Microsoft Installer file (.msi) or using the ClickOnce application deployment technology.
Installation of Whistle Studio Using Microsoft Installer
Inside of Windows, click the WhistleStudioInstaller.msi file provided by Coolearth. This will launch the installer application. You will be asked for the directory to install the application and if it should install the program for only the current user or for all users of that machine. Any updates to the program can be installed by simply running the new .msi provided, it will upgrade any files necessary and install over the top of the previous version.
Installation of Whistle Studio Using ClickOnce
ClickOnce application deployment requires a web server that can host pages with Frontpage Server Extensions enabled. The application is installed and downloaded from an internally accessed web page. The advantage to this strategy is that when the program is run, it can automatically check with the web server for any updated versions and install them all with the single click of a button. This way there is no need to go around and update all the workstations running Whistle Studio individually. To install the Whistle Studio for the first time with ClickOnce, navigate to the internal web page and click the ‘Install’ button.
Running Whistle Studio for the First Time
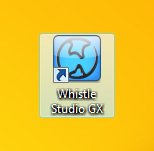
After the installation process is completed an icon should appear on your desktop and inside your start menu.
Double click the icon to launch the application. You should see a splash screen briefly appear. You will then presented with the login window, if this is the first time using Studio your database credentials will be blank.
After entering in filling in the section under "Database Credentials", enter the your Whistle/ERP user name and password into the "User Name" and "Password" fields respectively. Hit Enter or click the Login button to log in to Whistle Studio. If you are successful in logging in, Whistle Studio will save away your database credentials for the next time the application runs. Similarly if you checked the "Remember Me" check box, Whislte Studio will save away your Whistle/ERP user name and password.
If in the future you wish to change the database that Whistle Studio is pointed at, simply click the expansion indicator on the "Database Credentials" section and enter in the new connection settings.

