Difference between revisions of "GX:PO Return Window"
| (9 intermediate revisions by one other user not shown) | |||
| Line 1: | Line 1: | ||
This window is for the Purchase Order Returns transaction. | This window is for the Purchase Order Returns transaction. | ||
| + | |||
| + | [[Image:GX_POReturn_Main_100.jpg|500px|Image:GX_POReturn_Main_100.jpg|500px]] | ||
==PO Return== | ==PO Return== | ||
| − | Enter the Purchase Order number in the PO field. If you know the number, just enter it. Otherwise, use the list function (hitting the | + | Enter the Purchase Order number in the '''PO''' field. If you know the number, just enter it. Otherwise, use the list function (hitting the "Ctrl" and "A" keys) to see a list of purchase orders. |
| − | + | ||
| − | + | [[Image:GX_POReturn_chooserecpt_101.jpg|500px|Image:GX_POReturn_chooserecpt_101.jpg|500px]] | |
| − | + | Select a PO in the list by using the arrow keys, or the "A" and "Z" keys to move between the purchase orders, until the PO you want is highlighted. Pressing "Enter" will select that PO. You will be returned to the PO Return screen, and the '''PO''' number and the '''Receipt''' fields will be filled. | |
| − | + | Enter the track number that is being returned in the '''Track #''' field. Tabbing out of the '''Track #''' field will cause the remaining fields on the screen to be filled out with information from the container records. | |
| − | + | Highlight the "<Return>" button, and press "Enter", to set the selected container to be returned. | |
| − | + | [[Image:GX_POReturn_trackselected_102.jpg|500px|Image:GX_POReturn_trackselected_102.jpg|500px]] | |
| − | + | After the return set up is complete, focus will return to the '''Track #''' field, ready for you to set up another container on this purchase order to be returned. | |
| − | |||
| − | |||
| − | |||
| − | |||
| − | |||
| − | |||
| − | |||
==Options menu== | ==Options menu== | ||
| − | The <Options> button, when pressed, will display an Options menu. | + | The "<Options>" button, when pressed, will display an Options menu. |
| − | [[Image: | + | [[Image:GX_POReturn_viewreturns_103.jpg|500px|Image:GX_POReturn_viewreturns_103.jpg|500px]] |
===View Returns=== | ===View Returns=== | ||
| − | This option allows you to see what has been selected to be returned. Highlight this entry, and press | + | This option allows you to see what has been selected to be returned. Highlight this entry, and press "Enter". You will be taken to a screen displaying all the containers that have been set to be returned. |
| − | [[Image: | + | [[Image:GX_POReturn_pendingreturns_104.jpg|500px|Image:GX_POReturn_pendingreturns_104.jpg|500px]] |
| − | Press the | + | Press the "Back" key to return to the PO Return window. |
===Undo Return=== | ===Undo Return=== | ||
| − | This option allows to you remove a container from the list of containers to be returned. Highlight this entry, and press the | + | This option allows to you remove a container from the list of containers to be returned. Highlight this entry, and press the "Enter" key. You will be taken to a screen displaying all the containers that have been selected to be returned. Select the container to remove from the list by using the arrow keys or the "A" and "Z" keys to move between the containers on the list, until the desired container is highlighted. Press the "Enter" key to select that container. |
| − | + | [[Image:GX_POReturn_undoreturn_105.jpg|500px|Image:GX_POReturn_undoreturn_105.jpg|500px]] | |
| − | [[Image: | + | |
You will see a message confirming that the container was removed from the list of containers to be returned. | You will see a message confirming that the container was removed from the list of containers to be returned. | ||
| − | |||
| − | |||
==Done== | ==Done== | ||
| − | When you have finished setting up all of the containers to be returned, move to the <Done> button, and press the | + | When you have finished setting up all of the containers to be returned, move to the "<Done>" button, and press the "Enter" key. The PO Return transaction will begin. |
| − | |||
| − | [[Image: | + | First, you will be taken to a screen showing a list of the possible reasons for returning these containers. One of these reasons must be selected, either by typing the number next to the desired reason, or highlighting the reason, and pressing "Enter" to select that reason. |
| + | |||
| + | [[Image:GX_POReturn_Done_106.jpg|500px|Image:GX_POReturn_Done_106.jpg|500px]] | ||
After you have selected a reason, the transaction will continue. When it has finished, you will see a confirmation message. | After you have selected a reason, the transaction will continue. When it has finished, you will see a confirmation message. | ||
| − | [[Image: | + | [[Image:GX_POReturn_retcomplete_107.jpg|500px|Image:GX_POReturn_retcomplete_107.jpg|500px]] |
| + | |||
| + | |||
| + | When you have finished with the PO Returns transaction window, you can return to the Misc menu by either highlighting the "<Back>" button and pressing the "Enter" key, or pressing the "Esc" key. | ||
| + | |||
| + | ==[[GX:PO Return Window Settings|PO Return Window Settings]]== | ||
Latest revision as of 14:34, 3 August 2012
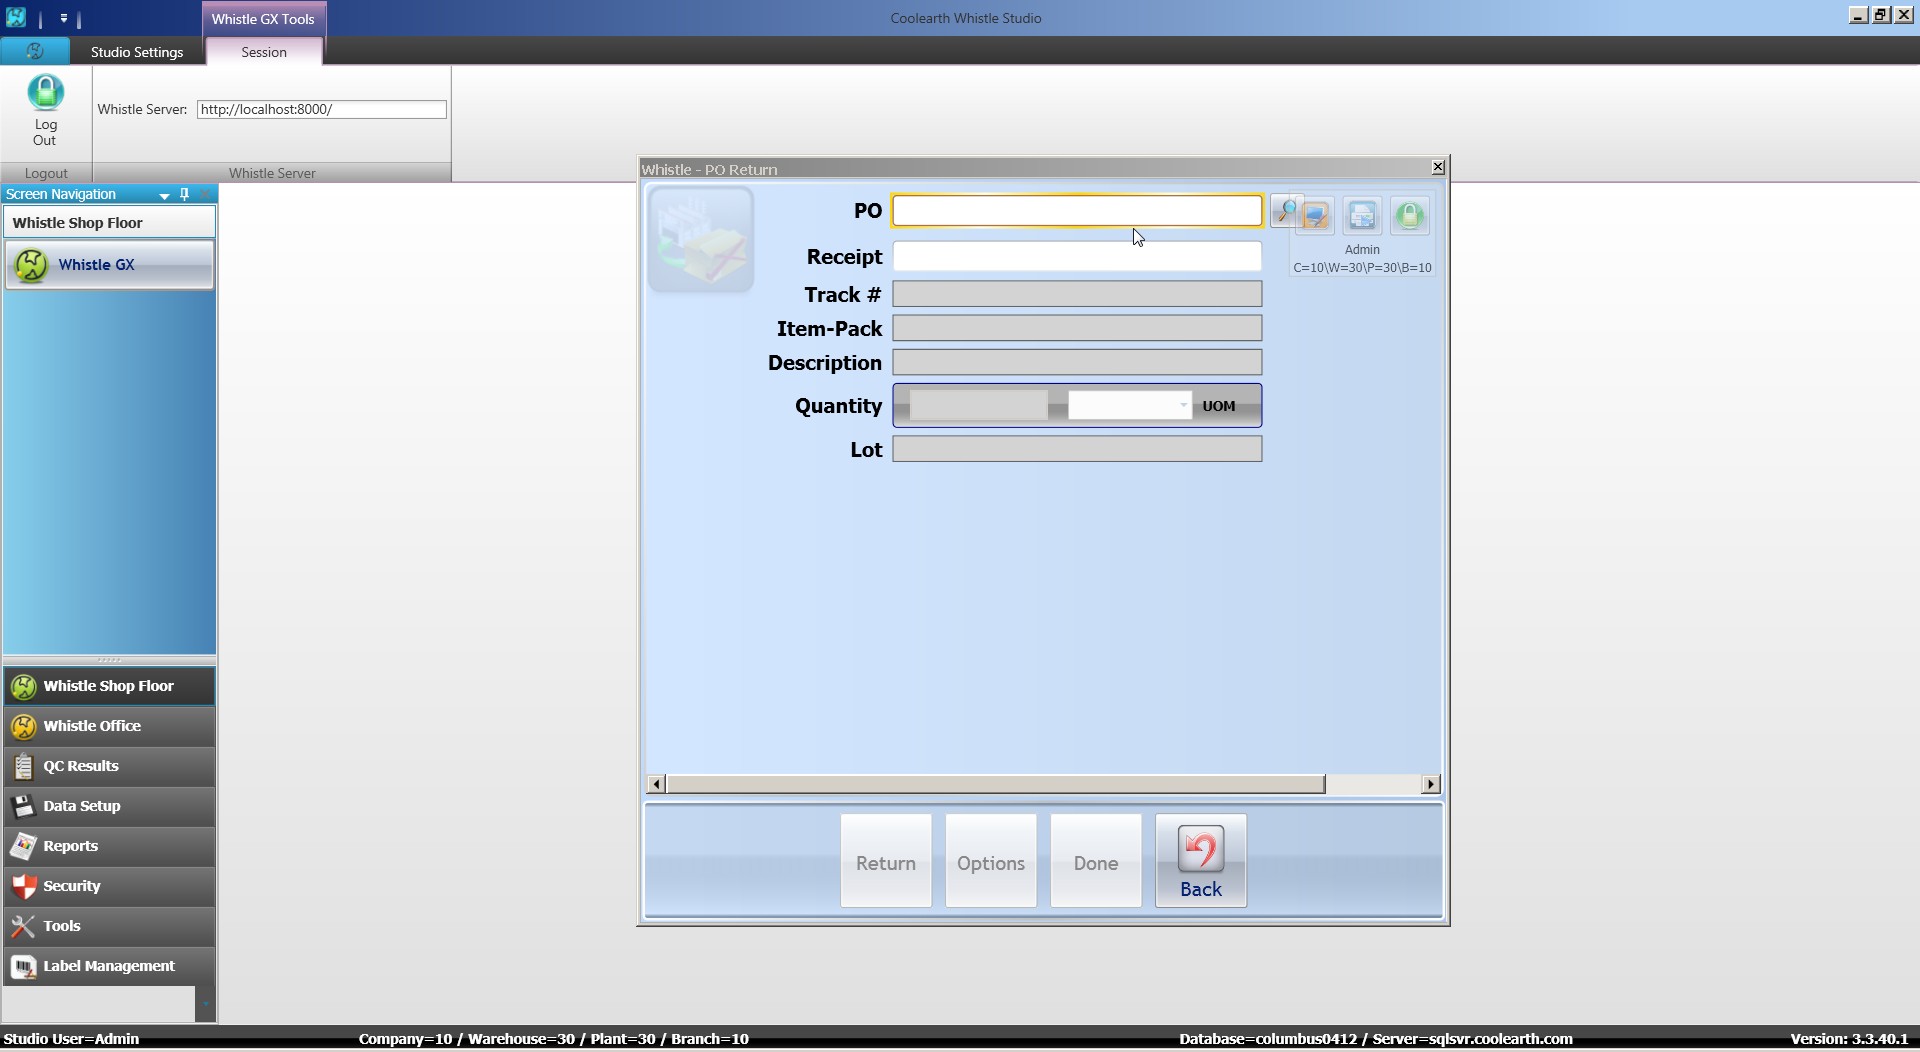
This window is for the Purchase Order Returns transaction.
Contents
PO Return
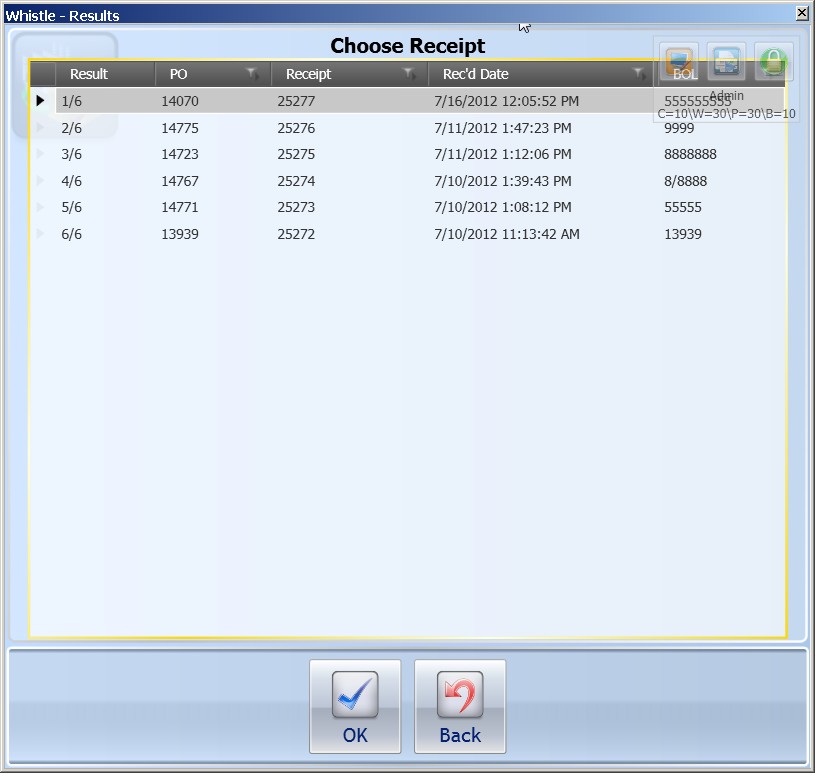
Enter the Purchase Order number in the PO field. If you know the number, just enter it. Otherwise, use the list function (hitting the "Ctrl" and "A" keys) to see a list of purchase orders.
Select a PO in the list by using the arrow keys, or the "A" and "Z" keys to move between the purchase orders, until the PO you want is highlighted. Pressing "Enter" will select that PO. You will be returned to the PO Return screen, and the PO number and the Receipt fields will be filled.
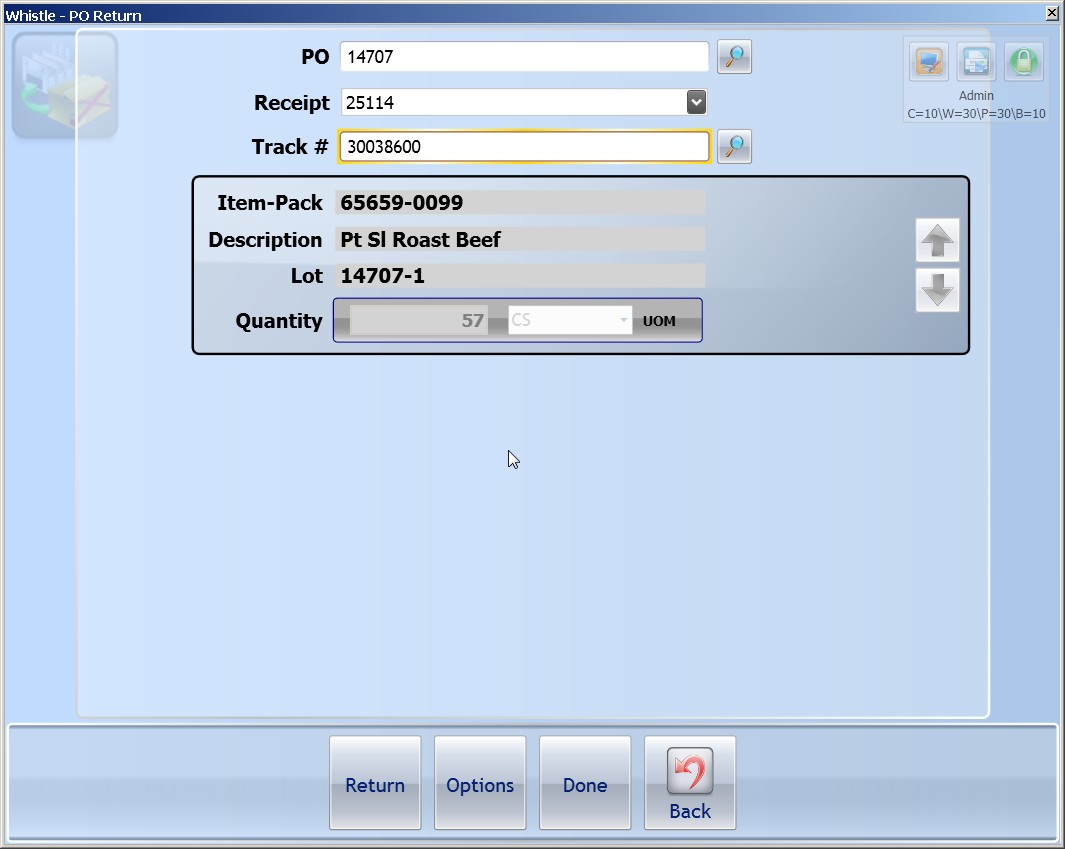
Enter the track number that is being returned in the Track # field. Tabbing out of the Track # field will cause the remaining fields on the screen to be filled out with information from the container records.
Highlight the "<Return>" button, and press "Enter", to set the selected container to be returned.
After the return set up is complete, focus will return to the Track # field, ready for you to set up another container on this purchase order to be returned.
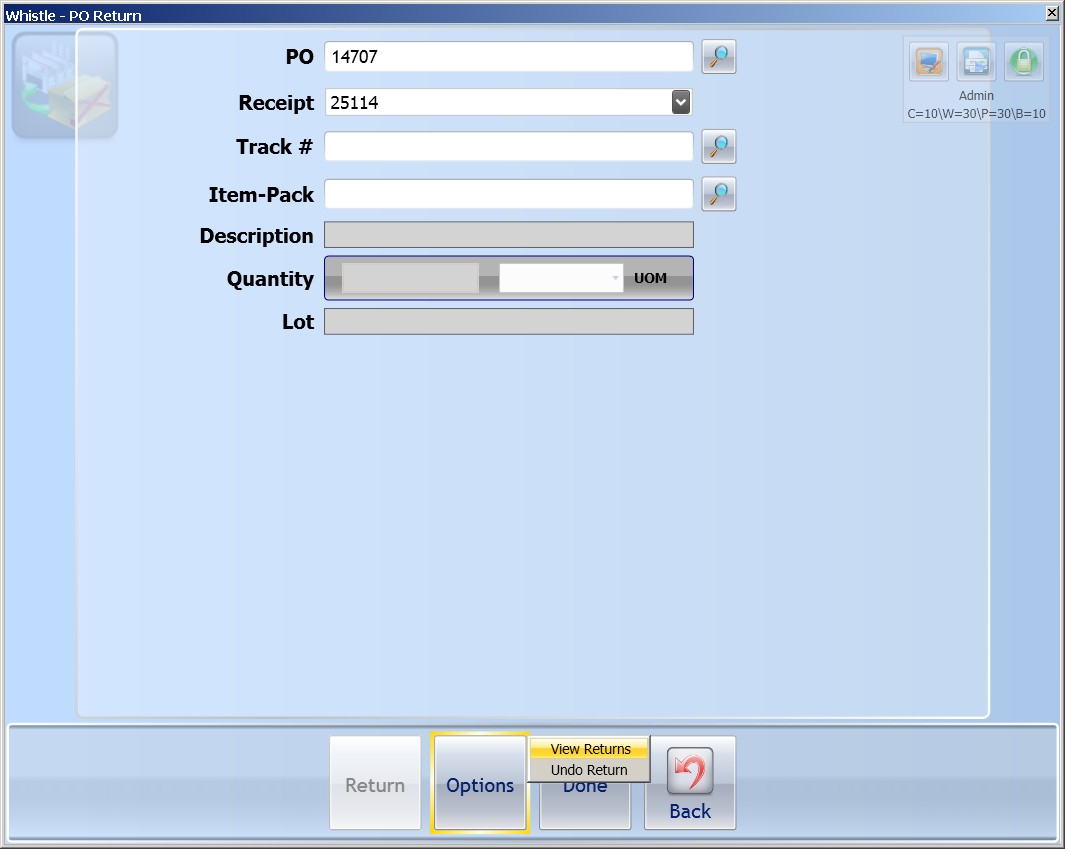
The "<Options>" button, when pressed, will display an Options menu.
View Returns
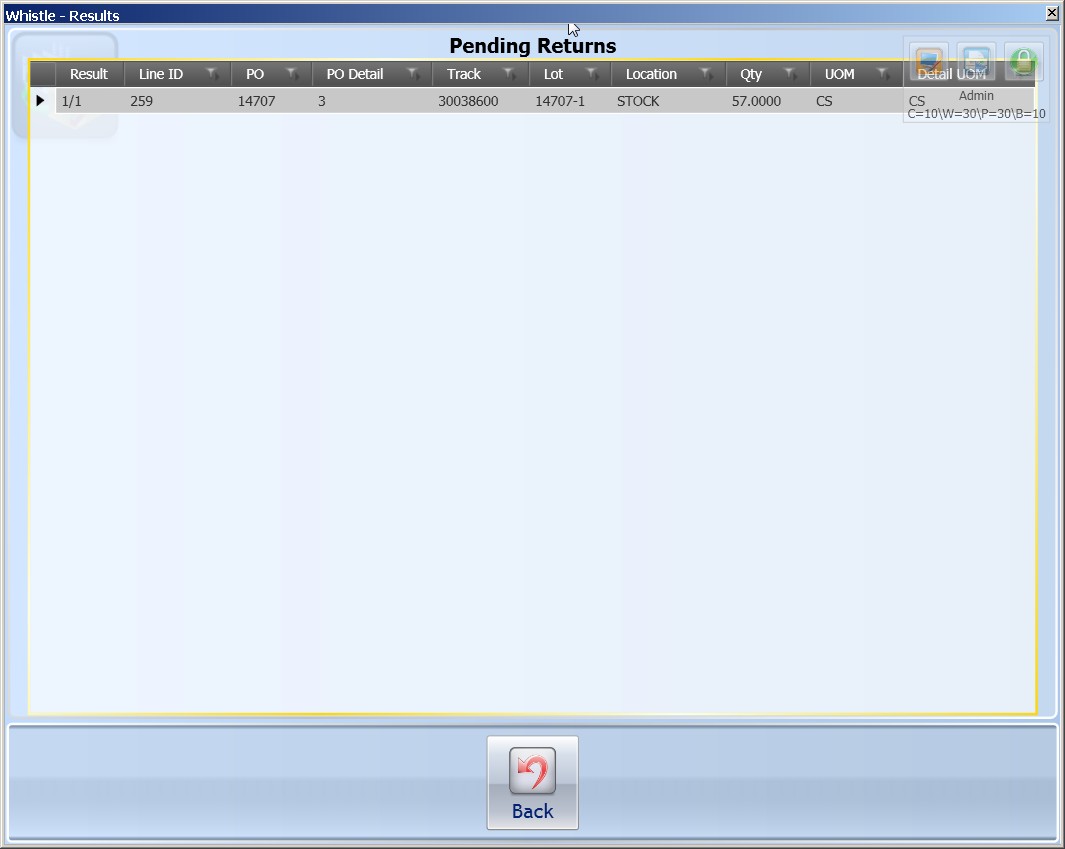
This option allows you to see what has been selected to be returned. Highlight this entry, and press "Enter". You will be taken to a screen displaying all the containers that have been set to be returned.
Press the "Back" key to return to the PO Return window.
Undo Return
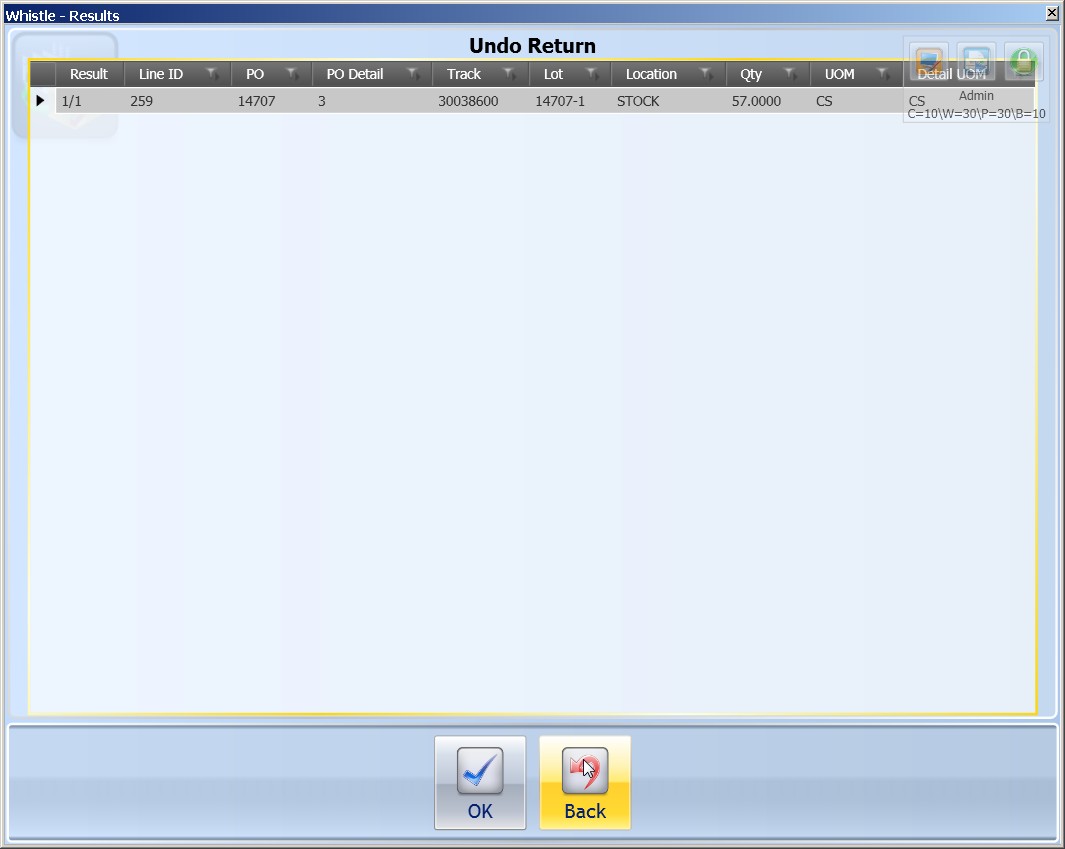
This option allows to you remove a container from the list of containers to be returned. Highlight this entry, and press the "Enter" key. You will be taken to a screen displaying all the containers that have been selected to be returned. Select the container to remove from the list by using the arrow keys or the "A" and "Z" keys to move between the containers on the list, until the desired container is highlighted. Press the "Enter" key to select that container.
You will see a message confirming that the container was removed from the list of containers to be returned.
Done
When you have finished setting up all of the containers to be returned, move to the "<Done>" button, and press the "Enter" key. The PO Return transaction will begin.
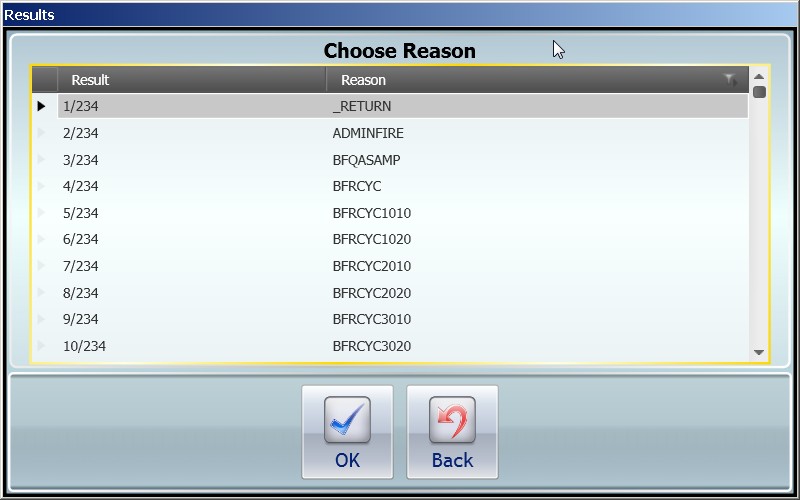
First, you will be taken to a screen showing a list of the possible reasons for returning these containers. One of these reasons must be selected, either by typing the number next to the desired reason, or highlighting the reason, and pressing "Enter" to select that reason.
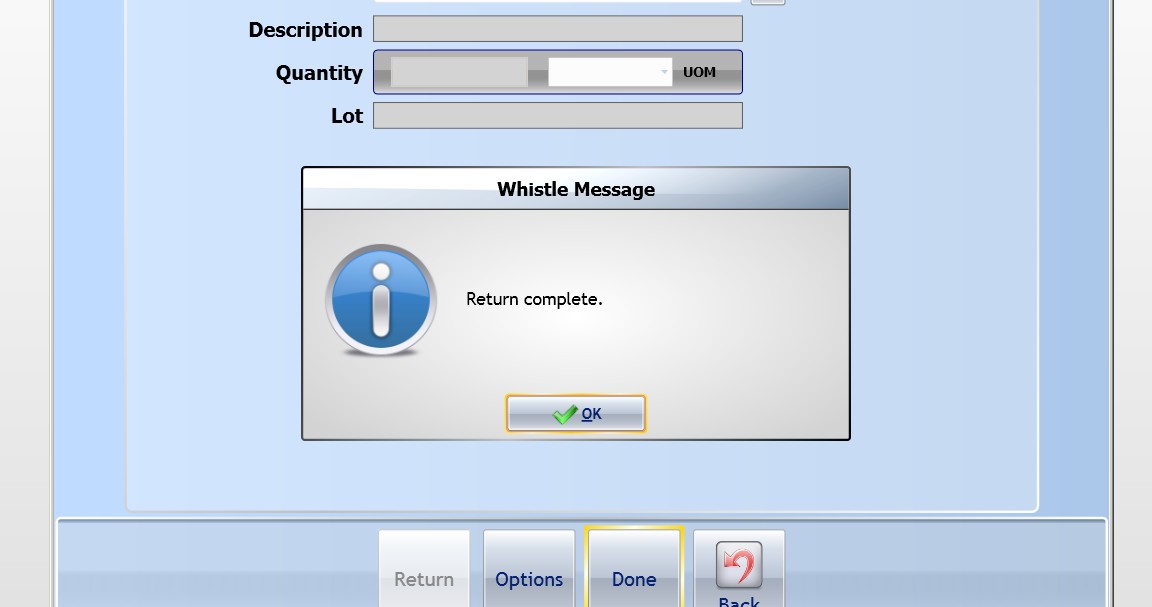
After you have selected a reason, the transaction will continue. When it has finished, you will see a confirmation message.
When you have finished with the PO Returns transaction window, you can return to the Misc menu by either highlighting the "<Back>" button and pressing the "Enter" key, or pressing the "Esc" key.
